

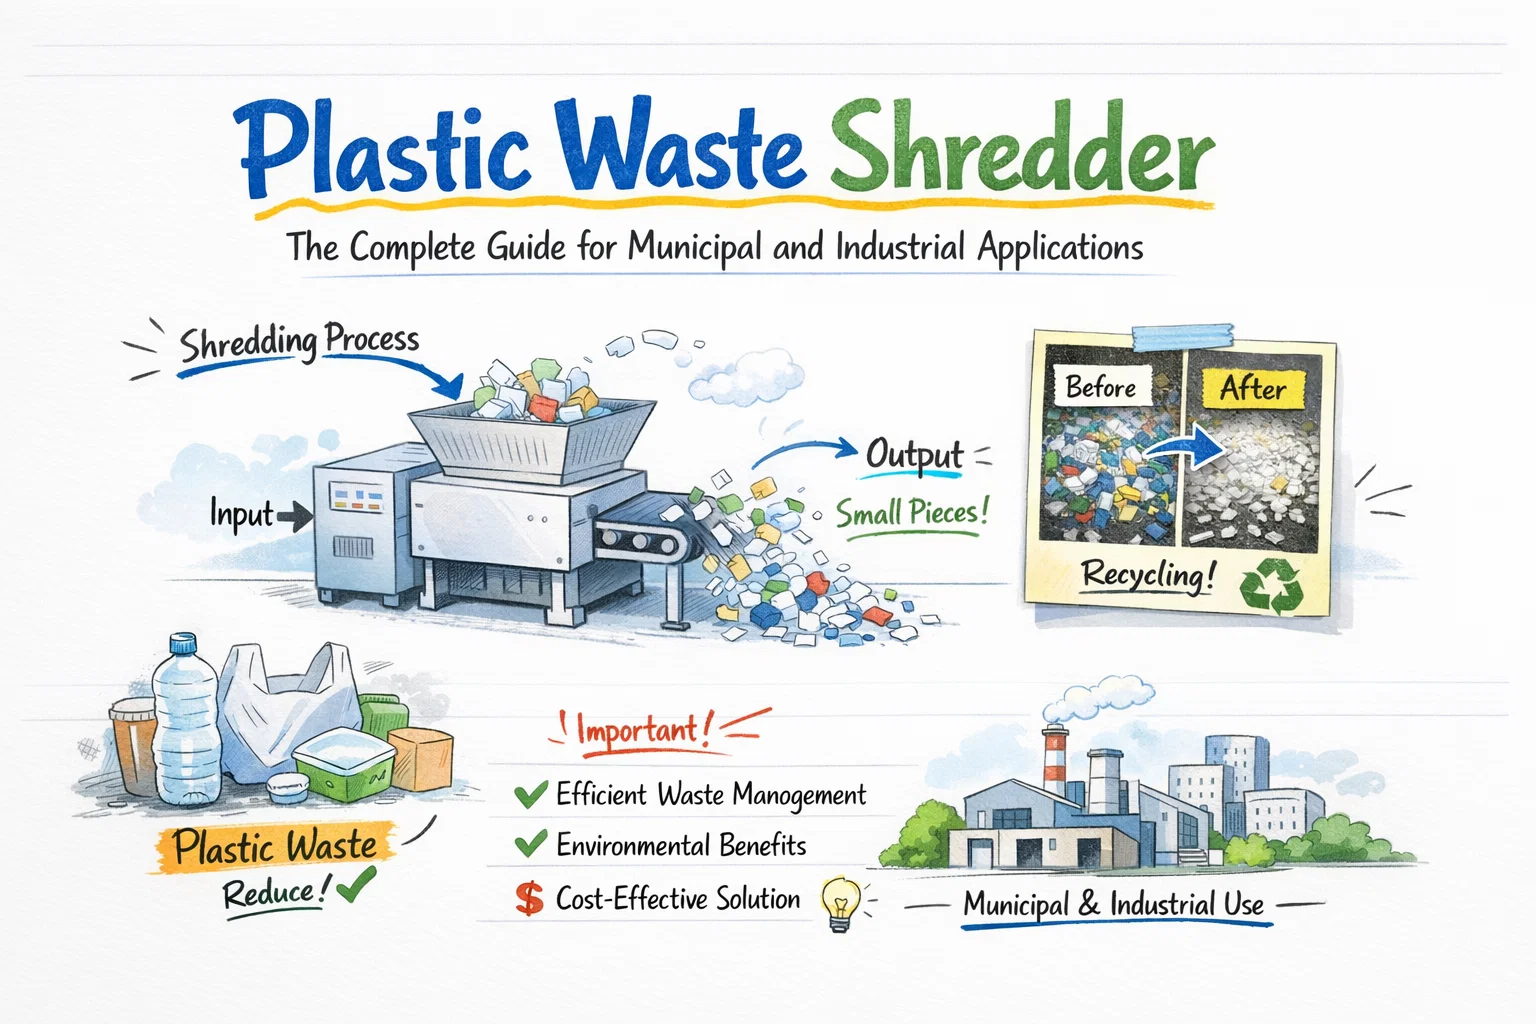
A plastic waste shredder is a heavy-duty machine that tears, cuts, or crushes plastic waste into uniform particles for downstream sorting, washing, or recycling. If you run a Material Recovery Facility (MRF), a plastic recycling plant, or an industrial waste operation, choosing the wrong shredder — or placing it incorrectly in your line — will bottleneck every process after it.
This guide covers everything procurement and operations managers need: machine types, pre-sorting requirements, throughput planning, MRF/MSW line integration, and real pricing benchmarks.
What Is a Plastic Waste Shredder?
A plastic waste shredder is industrial size-reduction equipment designed to break down plastic items — bottles, drums, pipes, film, pallets — into consistent output fragments, typically 30–150 mm in size. According to equipment specialists, shredders serve as the critical first stage in almost every plastic recycling process, making downstream washing, optical sorting, and pelletizing significantly more efficient.
Unlike granulators, which operate at high speed and require pre-shredded input, plastic waste shredders use low-speed, high-torque cutting action — typically 20–80 RPM — that handles bulky, contaminated, or mixed feed without pre-cutting. This makes them the entry point for both municipal solid waste (MSW) streams and industrial post-production scrap.
Types of Plastic Waste Shredder Machines
Not every shredder handles every plastic type equally. Choosing the wrong configuration is one of the most common and costly mistakes in recycling plant design.
Single-Shaft Shredders
A single-shaft shredder uses one rotating shaft with fixed blades against a stationary counter-knife. It excels at film, bags, lightweight rigid plastics, and post-consumer packaging because output size is controlled by a bottom screen.
- Throughput range: 200 kg/h – 2,000 kg/h
- Motor power: 15–75 kW
- Best for: PET bottle bales, LDPE film rolls, injection molding scrap
- Price range: $10,000 – $40,000
Double-Shaft Shredders
A double-shaft (twin-shaft) shredder uses two counter-rotating shafts that pull material inward and shear it. It delivers higher torque and handles rigid, thick-walled plastics — HDPE drums, PVC pipes, automotive bumpers — that would stall a single-shaft unit.
- Throughput range: 500 kg/h – 5,000 kg/h
- Motor power: 30–200 kW
- Best for: Mixed rigid plastic bales, large hollow containers, industrial plastic scrap
- Price range: $25,000 – $80,000
Four-Shaft Shredders
A four-shaft shredder adds two secondary shafts for a second shearing pass, producing tighter, more uniform particle sizes in a single machine. This design is preferred in RDF (Refuse-Derived Fuel) production and high-purity recycling lines where output consistency is critical.
- Throughput range: 1,000 kg/h – 10,000+ kg/h
- Motor power: 75–1,250 kW
- Best for: Mixed MSW plastics, large MRF pre-treatment, RDF/SRF preparation
- Price range: $60,000 – $250,000+
Choosing the Right Type: Quick Reference
| Criteria | Single-Shaft | Double-Shaft | Four-Shaft |
|---|---|---|---|
| Best plastic types | Film, light rigid | Rigid, thick-walled | Mixed/heterogeneous |
| Output size control | Screen-controlled | Moderate | Tightest uniformity |
| Handles contamination | Low | Medium | High |
| MSW/MRF integration | Secondary stage | Primary + secondary | Primary large-scale |
| Entry price | $10K | $25K | $60K+ |
The Challenge of Processing Mixed Plastic Waste
Mixed plastic waste is the hardest feed stream a shredder will face. Contamination, variable density, and incompatible polymer types all reduce effective throughput and increase blade wear. According to Reworld, mixed plastics cannot be efficiently recycled without proper sorting into individual polymer types — and shredding is the step that makes sorting possible in the first place.
Three specific challenges drive most operational headaches:
- Density variation: A single feed batch may contain lightweight LDPE film (density ~0.92 g/cm³) alongside rigid HDPE drums (density ~0.95 g/cm³) and heavy PVC pipe (density ~1.4 g/cm³). The shredder must handle all without jamming.
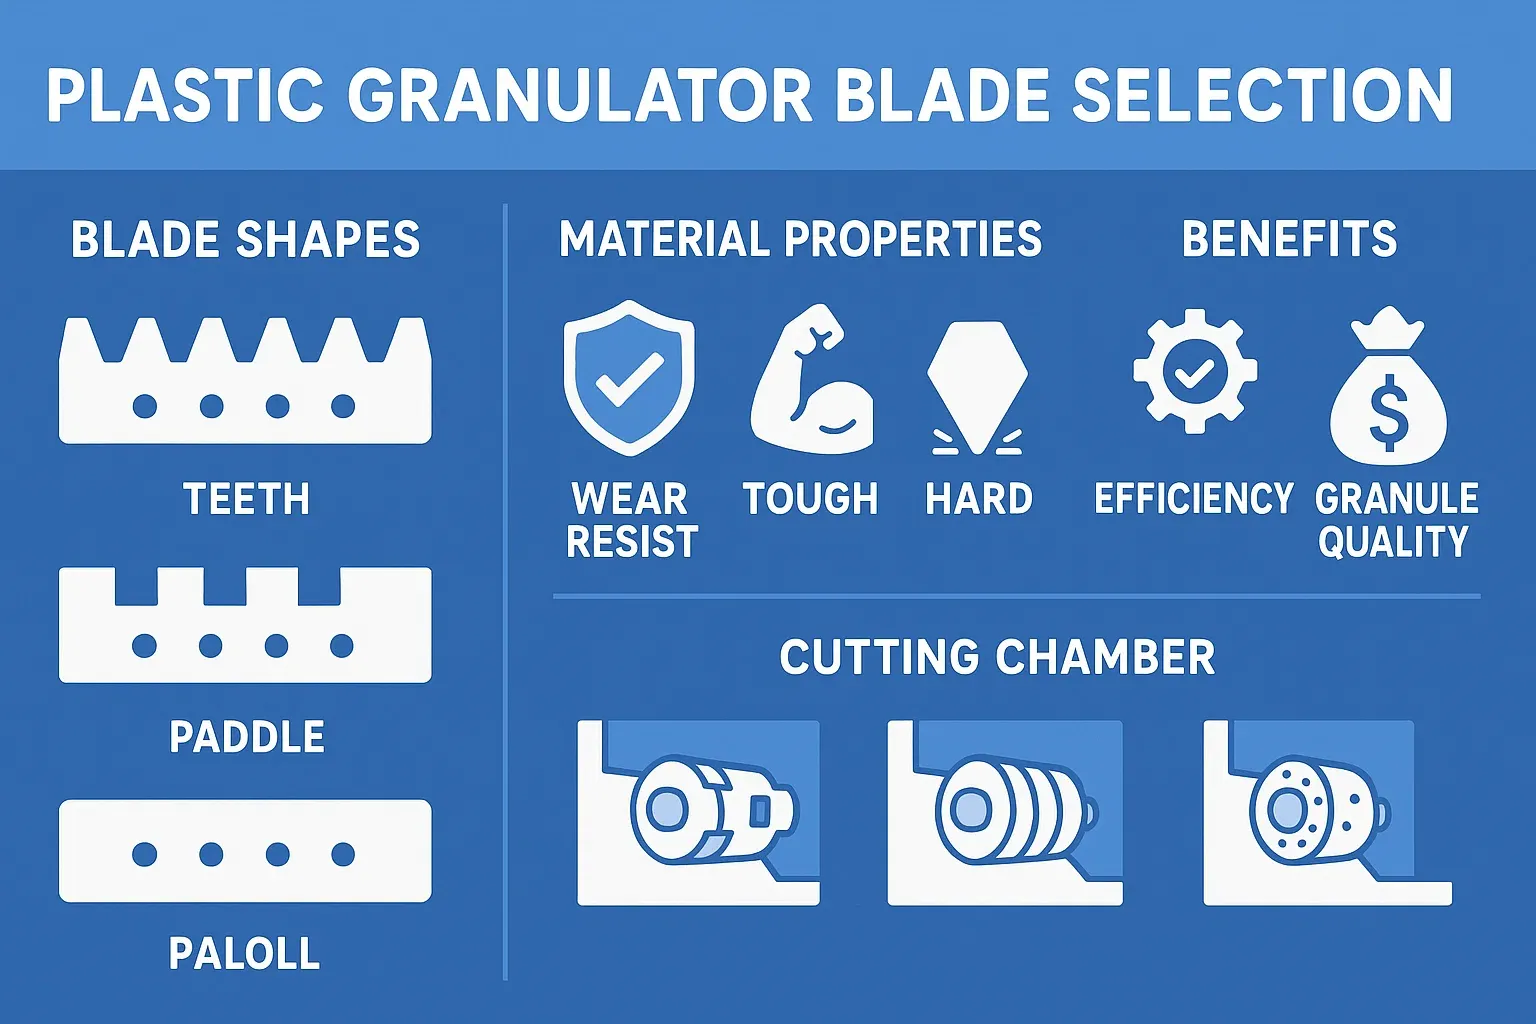
- Contamination load: Soil, food residue, metal fasteners, and glass shards inside plastic waste accelerate blade wear. Budget for blade replacement at 800–1,500 operating hours for heavily contaminated streams.
- Oversized or tangled materials: Long plastic pipes, strapping bands, and baled film wrap around shafts. Machines with automatic reverse rotation (standard on most twin-shaft models) prevent most jams without operator intervention.
Pre-Sorting Requirements Before Shredding
Running unsorted waste directly into a shredder without pre-conditioning is the fastest way to damage cutting blades and create dangerous jams. For both municipal and industrial operations, a pre-sorting stage protects your shredder and extends its service life.
Minimum pre-sort steps for MRF applications:
- Bag breaking: Open garbage bags with a dedicated bag-breaker machine before the shredder receives feed. Intact bags trap air and cause inconsistent shredding.
- Coarse trommel screening: A rotating drum screen (typically 80–150 mm mesh) removes fines, organics, and undersized material that don’t need shredding — reducing the load on the shredder by 15–30%.
- Ferrous metal removal: Install an overband magnetic separator above the infeed conveyor. Metal fragments left in the feed destroy cutting blades in hours.
- Manual pick station: A human inspection point (or AI-assisted vision system) removes hazardous items — gas cylinders, batteries, large glass — that could cause catastrophic machine failure.
For industrial post-production plastic scrap, pre-sorting requirements are simpler: separate by resin type (PET vs. HDPE vs. PP) if purity of the shredded output matters. If the output feeds an RDF line, mixed resins are acceptable.
Throughput Planning: How to Calculate Real Output
Manufacturer-rated capacity figures are almost always higher than real-world output. A shredder rated at 1,000 kg/h on clean HDPE flakes will deliver far less on contaminated mixed municipal plastics.
Use this two-step adjustment formula to calculate realistic throughput:
Step 1 — Material Hardness Index (MHI) adjustment: Real output = Rated capacity × MHI
Common MHI values:
- Clean PET/HDPE bottles: 0.80–0.90
- Mixed rigid plastics: 0.60–0.70
- Mixed MSW plastics (contaminated): 0.45–0.60
Step 2 — System Efficiency Coefficient (SEC) adjustment: Effective output = Step 1 result × SEC (typically 0.70–0.85 for continuous operations)
Example: A shredder rated at 2,000 kg/h on mixed rigid plastics (MHI = 0.65) operating with a SEC of 0.75:
- Step 1: 2,000 × 0.65 = 1,300 kg/h
- Step 2: 1,300 × 0.75 = 975 kg/h real output
This means a plant planning to process 15 tonnes/day (two 8-hour shifts) actually needs a machine rated at approximately 2,000 kg/h minimum — not 1,000 kg/h. Always size up, not down. An undersized shredder bottlenecks the entire line; an oversized one adds only marginal cost per tonne.
Plastic Waste Shredder in MRF and MSW Sorting Lines
A plastic waste shredder machine sits at the pre-treatment stage of a Material Recovery Facility — before optical sorters, air classifiers, and density separators. Its job is not to separate plastics; it is to reduce particle size so that separation equipment can work accurately.
Typical MRF Integration Sequence
- Receiving hopper → raw mixed waste input
- Bag breaker + trommel screen → pre-conditioning
- Plastic waste shredder → size reduction to 50–150 mm
- Overband magnet → ferrous metal removal
- Eddy current separator → non-ferrous metal removal
- Air classifier / ballistic separator → light vs. heavy fraction separation
- NIR optical sorter → PET / HDPE / PP / PVC identification and ejection
- Baler or conveyor to downstream → baled plastic fractions to recycler
The shredder’s output size directly determines the accuracy of every separation stage that follows. A NIR optical sorter, for example, performs best on particles between 40–120 mm — feed that is too large or too small reduces sort purity.
Integration with Energycle’s plastic shredders
Energycle’s plastic waste shredder line is designed for direct integration with downstream MRF sorting equipment. The shredders include PLC control and adjustable output screens, allowing operators to dial in particle size to match the requirements of their NIR sorters or washing lines. For plants processing rigid containers, the rigid plastic shredder series handles HDPE, PVC, and ABS at industrial scale.
Plastic Waste Shredder Cost: What to Budget in 2026
According to Energycle’s pricing data, plastic waste shredder machines range from $10,000 to $80,000 depending on shaft configuration, rotor width, blade material, and motor power.
| Machine Type | Capacity | Price Range (USD) | Best Application |
|---|---|---|---|
| Single-shaft shredder | 200–2,000 kg/h | $10,000 – $40,000 | Film, bottles, light rigid |
| Double-shaft shredder | 500–5,000 kg/h | $25,000 – $80,000 | Rigid, thick-walled, drums |
| Four-shaft shredder | 1,000–10,000+ kg/h | $60,000 – $250,000+ | MSW, MRF, RDF production |
| Starter system (shredder + granulator + conveyor) | 100–500 kg/h | $15,000 – $60,000 | Small recyclers, pilot lines |
Key cost drivers beyond the machine price:
- Blade material: D2 tool steel costs more upfront but lasts 2–3× longer than standard carbon steel blades on abrasive feeds.
- Motor power: Every 15 kW of added motor power adds roughly $3,000–$8,000 to machine cost.
- Hydraulic pusher: An integrated pusher adds $5,000–$15,000 but is essential for low-bulk-density materials like film bales.
- Installation and commissioning: Budget 10–15% of machine cost for on-site installation, especially for MRF integration with conveyor systems.
Key Takeaways and Next Steps
Selecting a plastic waste shredder is a capacity and integration decision, not just a machine purchase. Match your shredder type to your plastic feed stream, apply the MHI and SEC adjustments to size it correctly, and specify pre-sort equipment to protect it. When integrated correctly into a MRF or MSW sorting line, a properly specified shredder cuts downstream processing costs, improves sort purity, and extends the life of every machine after it.
Ready to specify the right machine for your operation? Explore Energycle’s plastic shredder range or contact the engineering team for a throughput assessment tailored to your waste stream.
Frequently Asked Questions
What is a plastic waste shredder?
A plastic waste shredder is an industrial machine that uses low-speed, high-torque rotating blades to tear and cut plastic waste into uniform fragments, typically 30–150 mm, for recycling or waste processing. It handles all plastic types — from thin film to rigid drums — and serves as the primary size-reduction step in MRF and recycling plant workflows.
Can a shredder handle mixed plastic waste?
Yes, a double-shaft or four-shaft plastic waste shredder machine can process mixed plastic waste streams, including contaminated and heterogeneous municipal plastic waste. However, effective pre-sorting — bag breaking, magnetic metal removal, and coarse trommel screening — is required beforehand to protect the blades and maintain consistent throughput. A contaminated mixed stream reduces effective capacity by 40–55% compared to clean single-resin input.
How much does a plastic waste shredder cost?
Plastic waste shredder prices range from $10,000 for a small single-shaft unit to over $250,000 for a high-capacity four-shaft industrial system. According to Energycle’s 2026 pricing data, the most common range for a production-ready double-shaft shredder for MRF or recycling plant use is $25,000–$80,000, with total installed system cost (including conveyors and controls) typically 25–40% higher than the machine price alone.

A metal scrap shredder reduces bulky ferrous and non-ferrous metal waste — car bodies, white goods, aluminium extrusions, copper wire, steel drums — into fist-sized fragments ready for magnetic separation, eddy current sorting, and downstream melting. For scrap yards and metal recyclers processing more than 5 tonnes per hour, an industrial metal shredder is the single equipment investment that determines throughput capacity, fragment quality, and profit per tonne.
Energycle manufactures heavy-duty metal scrap shredders with cutting forces from 30 to 200+ tonnes, designed for 24/7 operation on ferrous and mixed scrap streams. This guide covers shredder types, drive systems, cutting chamber design, capacity sizing, downstream separation, maintenance, and total cost of ownership — everything you need to specify the right machine for your scrap mix and target output.
What Does an Industrial Metal Shredder Do?
An industrial metal shredder uses high-torque, low-speed rotors fitted with hardened cutting tools to tear, shear, and crush metal objects into uniform fragments typically 50–150 mm in size. The shredded output passes through sizing screens and onto conveyors feeding magnetic separators, eddy current separators, and density sorting systems that recover clean ferrous, aluminium, copper, and zinc fractions.
Without pre-shredding, downstream separation equipment cannot efficiently sort mixed scrap. Large, irregularly shaped objects jam conveyors, bypass magnetic drums, and produce contaminated output that smelters penalise or reject. A properly sized metal shredder solves three problems simultaneously: volume reduction (10:1 to 15:1 compression ratio), liberation (separating metals from non-metallic attachments), and homogenisation (creating uniform fragment sizes for consistent sorting).
Types of Metal Scrap Shredders
Metal shredders are classified by cutting mechanism, rotor configuration, and target material. Each type balances throughput, fragment size, and capital cost differently.
Single-Shaft Shredders for Metal
A single-shaft shredder uses one rotating shaft with fixed cutting tools against a stationary anvil. Hydraulic pushers feed material into the cutting chamber at controlled rates. Single-shaft models excel at processing light mixed scrap — appliance housings, sheet metal offcuts, aluminium cans, and electronic waste — at throughputs of 2–15 tonnes per hour. The fixed screen underneath controls output particle size: swap the screen and you change the fragment dimension without adjusting the rotor.
Double-Shaft Shredders for Metal
A double-shaft shredder uses two counter-rotating shafts with interlocking cutting discs. Material is pulled into the gap between the shafts and sheared by opposing disc edges. This design handles the heaviest scrap: car bodies, structural steel, engine blocks, and reinforced concrete rebar. Throughputs range from 5–30+ tonnes per hour with cutting forces exceeding 100 tonnes. Double-shaft machines are the standard primary shredder in automotive recycling and heavy ferrous scrap operations.
Hammer Mill Shredders
Hammer mills use high-speed rotating hammers (1,000–1,500 RPM) to impact and fragment metal by kinetic energy rather than shear force. They produce the smallest, most uniform fragment sizes (20–80 mm) and are standard in automotive shredding plants processing 30–100+ tonnes per hour. The trade-off: higher energy consumption (500–3,000 kW motor), greater noise levels, and faster wear on hammers and liners. Hammer mills are typically preceded by a pre-shredder (single or double-shaft) that reduces car bodies to manageable pieces first.
Key Components and How They Affect Performance
Cutting Chamber and Rotor Design
The cutting chamber is the most stressed component. Look for chamber bodies fabricated from high-strength steel plate (minimum 50 mm wall thickness for heavy scrap applications) with bolt-on wear liners made from Hardox 450/500 or equivalent abrasion-resistant steel. The rotor shaft should be forged (not welded) from alloy steel with a minimum diameter of 400 mm for machines rated above 50 tonnes of cutting force.
Cutting tool geometry matters. Hook-style cutters pull material into the shearing zone aggressively — ideal for bulky items like car bodies and drums. Square-profile cutters produce more uniform fragments with less dust — better for aluminium and non-ferrous processing where contamination reduces value. Energycle’s metal shredders use interchangeable cutter cassettes, so you can switch profiles without removing the rotor.
Drive System
Metal shredders require massive torque at low speed. Two drive configurations dominate:
- Hydraulic direct drive: A hydraulic motor connects directly to the rotor shaft. Provides infinite speed control, automatic reversal when jams occur, and overload protection without mechanical shock. Preferred for single-shaft shredders processing mixed, unpredictable scrap.
- Electric motor with gearbox: A high-power electric motor (75–500 kW) drives the rotor through a planetary or helical gearbox. More energy-efficient than hydraulic drive at sustained high throughput. Standard on double-shaft shredders and hammer mills.
Sizing Screen
The screen below the cutting chamber determines output fragment size. Perforated plate screens with hole diameters of 50–150 mm are standard. Smaller holes produce finer, cleaner fragments but reduce throughput by 30–50% because material recirculates in the chamber longer. For most ferrous scrap applications, 80–120 mm screen openings provide the best balance between fragment quality and throughput.
Material Applications: Ferrous vs. Non-Ferrous vs. Mixed Scrap
| Scrap Type | Examples | Recommended Shredder | Throughput Range | Key Challenge |
|---|---|---|---|---|
| Heavy ferrous | Car bodies, structural steel, engine blocks | Double-shaft or hammer mill | 10–100+ t/h | Extreme cutting force needed |
| Light ferrous | Appliances, sheet metal, drums, cans | Single or double-shaft | 3–20 t/h | Variable density and shape |
| Non-ferrous | Aluminium extrusions, copper wire, brass fittings | Single-shaft (low speed) | 2–10 t/h | Avoid over-shredding; preserve value |
| E-scrap | PCBs, hard drives, servers, cables | Single-shaft with fine screen | 1–5 t/h | Precious metal recovery; Li-ion battery safety |
| Mixed/ASR | Post-shredder residue, mixed demolition | Double-shaft + secondary granulator | 5–15 t/h | Multi-material liberation |
For operations processing mixed scrap that includes both ferrous and non-ferrous metals, the shredder works as the first stage in a complete separation line. After shredding, a magnetic drum removes ferrous fragments, an eddy current separator ejects non-ferrous metals (aluminium, copper, zinc), and density or optical sorters handle the remaining fractions.
Capacity Sizing: Matching Shredder to Your Operation
Choosing the right industrial metal shredder machine starts with four numbers: daily tonnage, peak hourly throughput, input material dimensions, and target fragment size.
| Daily Volume | Recommended Type | Motor Power | Chamber Width | Typical Investment |
|---|---|---|---|---|
| 5–20 t/day | Single-shaft (hydraulic) | 55–110 kW | 800–1,200 mm | $80,000–$180,000 |
| 20–80 t/day | Double-shaft | 110–250 kW (2×) | 1,200–1,800 mm | $150,000–$400,000 |
| 80–300 t/day | Double-shaft + pre-shredder | 250–500 kW (2×) | 1,800–2,500 mm | $300,000–$800,000 |
| 300+ t/day | Hammer mill + pre-shredder | 500–3,000 kW | 2,000+ mm | $500,000–$2,000,000+ |
Critical sizing rule: Always specify your shredder based on the largest single item it must process, not average throughput. A machine rated for 10 t/h on light scrap may only achieve 3 t/h on dense engine blocks. Ask the manufacturer for throughput data specific to your material mix, not generic ratings.
Downstream Separation: From Fragments to Clean Metal Fractions
Shredding is step one. The real value is created by the separation equipment that follows. A complete metal scrap shredder line typically includes:
- Magnetic drum separator: Removes ferrous fragments (steel, iron) from the shredded stream. Recovery rates exceed 98% for properly sized fragments.
- Eddy current separator: Uses alternating magnetic fields to eject non-ferrous metals (aluminium, copper, brass, zinc). Essential for mixed scrap operations — a single ECS can add $50–100/tonne in recovered non-ferrous value.
- Air classifier / density separator: Removes light non-metallic fractions (foam, fabric, paper) from the metal stream using air flow.
- Optical/sensor sorter: For high-purity applications, XRF or colour-based sensors sort aluminium by alloy grade or separate copper from brass.
Energycle provides integrated shredder-plus-separation lines with matched throughput ratings. Our eddy current separator guide covers non-ferrous recovery in detail.
Safety and Environmental Considerations
Explosion and Fire Prevention
Metal shredders processing mixed scrap face real fire and explosion risks from sealed containers (aerosol cans, gas cylinders), lithium-ion batteries in e-scrap, and volatile organic residues on painted or coated metals. Essential safety systems include: infeed inspection and pre-sort (remove gas cylinders and sealed containers before shredding), fire suppression (water mist or inert gas systems on the discharge conveyor), explosion venting panels on the cutting chamber, and temperature monitoring on bearings and oil systems.
Noise and Dust Control
Metal shredding generates 95–115 dB at the source. Acoustic enclosures reduce this to 80–85 dB at the operator station. Dust extraction systems with cyclone pre-separators and bag filters capture fine metal particles and non-metallic dust. In regions with strict particulate emission limits (EU Industrial Emissions Directive), HEPA-grade filtration may be required on the exhaust.
Maintenance and Wear Parts
Metal shredders operate under extreme abrasive and impact loads. A structured maintenance program is essential for sustained uptime.
Cutting Tools
Rotor cutters are the primary wear item. Tool life varies from 500 to 5,000 operating hours depending on material hardness — aluminium cans barely wear tools, while manganese steel plate destroys them rapidly. Most cutters are four-sided: when one edge dulls, rotate the cutter 90° for a fresh edge, getting 4× the life before replacement. Energycle uses cutter steel hardened to 55–60 HRC with optional tungsten carbide tips for extreme-wear applications. Budget $5,000–$20,000 annually for cutter replacement on a mid-size machine.
Screens and Liners
Sizing screens and chamber liners wear from continuous abrasion. Hardox 450 screens last 2,000–4,000 hours on ferrous scrap. Inspect screens weekly for hole enlargement — worn screens pass oversized fragments that reduce downstream separation efficiency. Chamber liners should be checked monthly and replaced when worn to half original thickness.
Bearings and Seals
Main shaft bearings (typically spherical roller bearings) require grease replenishment every 8–24 hours of operation via automatic lubrication systems. Shaft seals prevent metal dust from entering bearing housings — a failed seal leads to bearing destruction within days. Replace seals at the first sign of grease contamination.
Frequently Asked Questions
What is the difference between a metal shredder and a metal crusher?
A metal shredder uses rotating cutting tools to shear material into fragments of controlled size. A metal crusher uses compression force (hydraulic press or jaw mechanism) to flatten or compact metal without size reduction. Shredders produce fragments suitable for downstream sorting and smelting; crushers produce compacted bales or flattened bodies for transport. Most metal recycling operations use a shredder, not a crusher, because smelters require sized fragments, not compacted blocks.
How much does an industrial metal shredder cost?
Prices range from $80,000 for a single-shaft machine processing 5–10 t/h of light scrap, to $2,000,000+ for a complete hammer mill shredder line with pre-shredder, magnetic separation, eddy current separator, and dust extraction. Most mid-size scrap operations invest $150,000–$400,000 in a double-shaft shredder with magnetic separation.
What throughput can I expect from a metal scrap shredder?
Throughput depends on material type, density, and target fragment size. A 200 kW double-shaft shredder typically processes 8–15 t/h of mixed light scrap, 5–10 t/h of heavy ferrous, or 3–6 t/h of dense engine blocks. Smaller screen openings reduce throughput because material recirculates longer. Always request material-specific throughput data from the manufacturer.
How long do shredder blades last on metal?
Blade life ranges from 500 hours (processing manganese steel or abrasive alloys) to 5,000 hours (processing aluminium cans or light mixed scrap). Most ferrous scrap operations achieve 1,500–3,000 hours per blade set. Four-sided reversible cutters quadruple effective life. Annual blade costs typically run $5,000–$20,000 for a mid-size shredder.
Can a metal shredder process whole cars?
Yes, but it requires a large machine. Whole car shredding typically uses a hammer mill with 1,000+ kW motor power, preceded by a pre-shredder that splits the car into 2–4 pieces. Smaller double-shaft shredders (200–500 kW) can process pre-flattened car bodies or quarter-car sections. The entire automotive shredding line — including pre-shredder, hammer mill, magnetic separator, eddy current separator, and air classifier — costs $1,000,000–$3,000,000+.
What safety features are essential for a metal scrap shredder?
Minimum requirements: emergency stops on all sides, automatic rotor reversal on jam detection, fire suppression system on the discharge conveyor, explosion venting panels, lockout/tagout provisions, and acoustic enclosure to keep operator-position noise below 85 dB. For e-scrap operations, add lithium-ion battery detection on the infeed conveyor and inert gas fire suppression.
How does a metal shredder differ from a plastic shredder?
Metal shredders use much higher cutting forces (30–200+ tonnes vs. 5–30 tonnes for plastic), heavier rotor construction, and harder cutting tools (55–60 HRC vs. 45–52 HRC). Metal shredder chambers have thicker walls and wear liners to withstand impact. Drive motors are 3–10× more powerful. A plastic shredder should never be used for metal scrap — it will destroy the cutting tools and potentially crack the rotor shaft.
What is the ROI payback period for a metal shredder?
Payback depends on scrap volume, purchase price differential (shredded vs. unshredded scrap), and non-ferrous recovery value. A typical mid-size operation processing 50 t/day of mixed scrap recovers the investment in 12–24 months, primarily through: higher selling price for sized ferrous scrap ($20–40/tonne premium), recovered non-ferrous metals ($50–200/tonne depending on aluminium/copper mix), and reduced transport costs (3–5× more weight per truck with shredded material).
Your Next Step
Selecting the right industrial metal shredder means matching cutting force, chamber size, and drive configuration to your specific scrap mix and throughput target. Energycle’s engineering team provides free capacity assessments for metal recycling operations — share your daily tonnage, material types, and target fragment size, and we will recommend a complete shredder-plus-separation configuration with a detailed cost and ROI projection. View our heavy-duty metal shredder range or contact us to start your assessment.
Related Resources
- Heavy-Duty Metal Scrap Shredder
- General-Purpose Single-Shaft Shredder
- Double Shaft Shredder for Plastic, Metal & Tire
- Eddy Current Separator Guide
- Industrial Plastic Shredders
- Tire Recycling Machine Guide
- Tungsten Carbide Shredder Rotor Knives
- E-Scrap Shredder for Data Destruction
- Industrial Baler Guide
An industrial baler compresses loose recyclable materials — cardboard, plastics, textiles, metals — into dense, uniform bales that are easier and cheaper to store, transport, and sell. For recycling facilities processing more than a few tonnes per day, a baler is not optional equipment; it is the single machine that turns bulky waste streams into revenue-generating commodities.
At Energycle, we manufacture horizontal and vertical industrial baling machines rated from 10 to 120+ tonnes of pressing force. This guide covers every decision point — baler types, hydraulic systems, material-specific configurations, energy efficiency, capacity sizing, and maintenance — so you can select the right machine for your throughput, material mix, and budget.
What Does an Industrial Baler Do?
A baler machine uses hydraulic pressure to compact loose recyclables into rectangular bales bound with steel wire or polyester strapping. A single bale of cardboard typically weighs 400–600 kg and measures roughly 1,100 × 800 × 750 mm, compared to the 6–8 m³ of loose material it replaces. That compression ratio — often 8:1 to 15:1 depending on the material — slashes freight costs, reduces warehouse footprint, and meets the density specifications that downstream buyers require.
Without a baler, recyclers face three compounding problems: high transport costs (trucks leave half-empty because loose material fills volume before reaching weight limits), low commodity prices (loose material fetches 20–40% less per tonne than properly baled material), and safety hazards (loose piles of cardboard and plastic film create fire risks and block emergency exits). A well-matched industrial baler eliminates all three.
Types of Industrial Balers: Horizontal vs. Vertical
The two main categories are horizontal balers and vertical balers. The choice depends primarily on throughput volume, available floor space, and the degree of automation your operation requires.
Horizontal Baler Machines
A horizontal baler machine feeds material from one end, compresses it horizontally, and ejects finished bales from the opposite end — often onto a conveyor or directly into a truck. Horizontal models handle higher throughput (typically 3–30+ tonnes/hour) and integrate easily with conveyor-fed production lines. They are the standard choice for MRFs, paper mills, plastics recycling plants, and any facility processing more than 10 tonnes per shift.
Energycle’s fully automatic horizontal baler operates with minimal operator intervention: material feeds continuously via conveyor, the compression cycle triggers automatically when the chamber is full, and finished bales eject without stopping the infeed. For operations that need operator control over cycle timing, our semi-automatic horizontal baler provides manual cycle initiation at a lower capital cost.
Vertical Balers
Vertical balers compress material downward into a chamber beneath the ram. They occupy a small footprint (typically 1.5–3 m²), cost less than horizontal models, and suit facilities processing 1–5 tonnes per day. Retail stores, distribution centers, and small recycling yards often start with a vertical baler before scaling up.
Energycle’s vertical PET bottle and can baler is designed specifically for beverage container recycling, while our vertical fiber and textile baler handles post-consumer garments, fabric scraps, and nonwoven offcuts with bale weights up to 250 kg.
Automatic vs. Semi-Automatic: Choosing the Right Level
Automation level affects labour costs, throughput consistency, and capital expenditure. Here is a practical comparison:
| Feature | Fully Automatic Horizontal Baler | Semi-Automatic Horizontal Baler | Vertical Baler |
|---|---|---|---|
| Feeding method | Conveyor (continuous) | Conveyor or manual | Manual top-load |
| Cycle initiation | Auto-sensor triggered | Operator button press | Operator button press |
| Bale ejection | Automatic | Automatic or manual | Manual (forklift) |
| Throughput | 5–30+ t/h | 3–15 t/h | 0.5–3 t/h |
| Labour required | 0–1 operator | 1 operator | 1 operator |
| Typical press force | 60–120+ tonnes | 40–80 tonnes | 10–60 tonnes |
| Floor space | Large (8–15 m length) | Medium (6–10 m) | Small (1.5–3 m²) |
| Best for | MRFs, high-volume plants | Mid-volume recyclers | Retail, small yards |
How a Hydraulic Baler Works: Key Components
Every hydraulic baler shares the same core operating principle: a hydraulic cylinder drives a ram plate into a compression chamber, squeezing material until it reaches the target density. Understanding the main components helps you evaluate build quality and long-term reliability when comparing manufacturers.
Hydraulic System
The heart of any baler. An electric motor drives a hydraulic pump that pressurises oil to 16–25 MPa, which pushes the main cylinder. Key specs to compare: cylinder bore diameter (determines maximum force), pump displacement (determines cycle speed), and oil tank capacity (affects heat dissipation during continuous operation). Energycle uses Rexroth and Parker hydraulic components across its baler range for proven reliability in 24/7 recycling environments.
Compression Chamber and Ram
The chamber walls and ram plate endure enormous repeated stress. Look for hardened steel construction (typically Hardox 400 or equivalent) with a minimum wall thickness of 12 mm on the chamber and 20 mm on the ram plate. Wear liners on the chamber floor extend service life in abrasive applications like metal and glass recycling.
Tying System
Finished bales are secured with galvanized steel wire or quick-lock baling wire. Automatic tying systems on horizontal balers insert and knot 4–6 wires per bale without stopping the compression cycle. Manual tying on vertical balers requires the operator to thread wire through channels — slower but adequate for low-volume operations.
Control System
Modern industrial balers use PLC control (Siemens S7-1200 or equivalent) with touchscreen HMI. The controller manages ram pressure, cycle timing, bale length, wire tension, and safety interlocks. Remote monitoring via 4G/Ethernet lets plant managers track cycles per hour, hydraulic oil temperature, and maintenance alerts from any device.
Material-Specific Baler Configurations
Different recyclable materials have different bulk densities, friction coefficients, and moisture levels. A baler optimised for OCC cardboard will underperform on PE film or wet textiles. Below are the configurations we recommend by material stream.
Industrial Cardboard Baler
OCC (Old Corrugated Containers) is the highest-volume material for most MRFs. An industrial cardboard baler typically needs 40–80 tonnes of press force to achieve the 400–500 kg/m³ bale density that paper mills require. Chamber dimensions of 1,100 × 800 mm produce standard “mill-size” bales accepted globally. Energycle’s cardboard and paper baler processes 5–15 tonnes per hour with automatic tying and ejection.
Plastic Film and PET Bottle Balers
Plastic film (LDPE stretch wrap, HDPE bags) is springy and resists compression. Balers for film need higher press force per chamber area (60–100+ tonnes) and retraction dwell time to prevent bale expansion after the ram retracts. For PET bottles, Energycle’s vertical PET baler achieves bale densities of 300–400 kg/m³. Facilities running a complete PET line often pair the baler with a PET bottle washing line for flake-grade output.
Textile Baler
Post-consumer textiles and industrial fabric waste require balers with extra-wide feed openings (to accommodate bulky garments) and moderate press force (30–60 tonnes). Bale weights of 200–350 kg are standard for the second-hand clothing and fibre recycling markets. Energycle’s textile baler pairs well with our textile shredder for operations that need to shred before baling.
Metal Balers
Aluminium cans, steel scrap, and copper wire need 80–200+ tonnes of press force due to the material’s rigidity. Chamber walls must be reinforced to withstand metal-on-metal impact. Cycle times are longer (30–60 seconds vs. 15–25 seconds for cardboard) because the ram must build pressure gradually to avoid hydraulic shock.
Capacity and Tonnage: How to Size Your Baler
Choosing the right baler size starts with three numbers: daily material volume (tonnes/day), peak hourly throughput (tonnes/hour), and target bale density (kg/m³). Under-sizing creates bottlenecks; over-sizing wastes capital and energy.
| Daily Volume | Recommended Baler Type | Press Force Range | Motor Power | Bales per Hour |
|---|---|---|---|---|
| 1–5 t/day | Vertical baler | 10–40 tonnes | 5.5–15 kW | 3–8 |
| 5–20 t/day | Semi-auto horizontal | 40–80 tonnes | 18.5–37 kW | 8–20 |
| 20–80 t/day | Fully auto horizontal | 60–100 tonnes | 37–55 kW | 15–35 |
| 80+ t/day | Two-ram or channel baler | 80–120+ tonnes | 55–110 kW | 25–50+ |
Practical tip: Size your baler for 120% of current peak throughput. Recycling operations tend to grow 10–15% annually, and running a baler at sustained maximum capacity accelerates wear on seals, pumps, and tying systems. A 20% headroom cushion extends component life and avoids costly mid-shift downtime during peak seasons.
Energy Efficiency in Industrial Baling Machines
Energy-efficient balers reduce operating costs significantly — electricity typically accounts for 30–45% of total baler operating cost over a 10-year lifecycle. Three design features have the biggest impact on energy consumption:
Variable-Frequency Drive (VFD) Motors
A VFD adjusts motor speed to match real-time load demand. During the low-resistance phase at the start of each stroke, the motor runs at reduced speed and draws less current. VFD-equipped balers consume 25–40% less electricity than fixed-speed models over a full production shift, based on data from installations across Southeast Asian and European recycling plants.
Servo-Hydraulic Pump Systems
Servo pumps deliver oil on demand rather than running continuously. When the ram is idle between cycles, the pump draws near-zero current. Combined with VFD control, servo-hydraulic systems cut energy use by up to 50% compared to conventional fixed-displacement pumps — while also reducing hydraulic oil temperature by 15–20°C, which extends seal and hose life.
Standby and Auto-Off Features
Balers with intelligent standby mode shut down the motor after a configurable idle period (typically 3–5 minutes) and restart automatically when material triggers the infeed sensor. In facilities where the baler runs intermittently — common in retail and distribution — this alone can reduce annual energy cost by 10–15%.
How to Choose the Right Industrial Baler for Your Operation
Selecting a recycling baler involves more than matching press force to material type. Use this seven-point checklist when evaluating baler suppliers:
- Define your material mix. A single-stream operation (e.g., OCC only) has different requirements than a multi-material MRF handling cardboard, film, PET, and metals. Multi-material operations often need a baler with adjustable pressure settings and quick-change feed configurations.
- Calculate throughput with growth margin. Use the 120% rule described above. If your current peak is 10 t/h, size for 12 t/h minimum.
- Check bale specifications from your buyer. End-market buyers (paper mills, rPET processors, textile sorters) have specific bale weight, density, and size requirements. Confirm your baler can produce bales that meet these specs — a bale that’s 50 kg underweight may be rejected or price-penalised.
- Evaluate total cost of ownership. Capital price is 40–50% of 10-year total cost. Remaining costs: electricity (30–35%), wear parts — seals, blades, wire (10–15%), and maintenance labour (10–15%). Request a TCO breakdown from each supplier.
- Inspect hydraulic and electrical components. European or Japanese hydraulic components (Rexroth, Parker, Yuken) and PLC controllers (Siemens, Schneider) offer better durability and global parts availability than unbranded alternatives.
- Confirm safety features. Minimum requirements: emergency stop buttons on all sides, light curtains or safety edges on the feed opening, lockout/tagout provisions, and CE or equivalent certification.
- Request references and trial-run video. Ask for contact details of 2–3 existing customers running similar materials at similar volumes. A reputable manufacturer will provide these without hesitation.
Integration with Upstream and Downstream Equipment
A baler rarely operates in isolation. In a complete recycling line, it sits after shredding, washing, or sorting stages and before logistics/warehousing. Understanding the interfaces between these stages prevents throughput mismatches.
Upstream: Shredders and Granulators
Oversized materials (furniture, large boxes, bulky plastic items) need size reduction before baling. A plastic shredder breaks material to a consistent particle size that feeds evenly into the baler chamber, improving bale density and reducing void spaces. For plastic recycling lines that process material into pellets rather than bales, a plastic granulator follows the shredder stage.
Downstream: Debalers
At the receiving end, paper mills and plastic processors use a debaler machine to break bales apart for further processing. When specifying bale wire type and bale density, consider what debaling equipment the buyer uses — over-compressed bales with heavy-gauge wire take longer to debale and can damage downstream equipment. Energycle also manufactures vertical debaler machines for high-volume receiving operations.
Maintenance and Safety Best Practices
Industrial balers operate under extreme hydraulic pressure and process abrasive materials. A structured maintenance program prevents unplanned downtime and protects operators.
Daily Checks
- Inspect hydraulic oil level and check for leaks at cylinder seals and hose fittings
- Verify emergency stop buttons function correctly on all sides of the machine
- Clear material jams from the feed opening and tying area
- Check wire or strapping supply levels to prevent mid-cycle stoppages
Weekly Checks
- Grease all pivot points and guide rail surfaces
- Inspect tying needles and knotters for wear or misalignment
- Check hydraulic oil temperature — sustained temperatures above 65°C indicate cooling system issues
- Test light curtains and safety interlocks
Quarterly and Annual Maintenance
- Replace hydraulic oil filter elements (quarterly) and full oil change (annually or per manufacturer schedule)
- Inspect cylinder seals and replace at first sign of external leakage
- Check chamber wall wear — walls worn below minimum thickness compromise bale density
- Calibrate pressure sensors and PLC safety parameters
- Inspect electrical cabinets: tighten connections, check for heat damage, clean cooling fans
Safety Protocols
Baler-related injuries most commonly involve hands and arms caught in the feed opening or tying area. Enforce these non-negotiable rules: never reach into the compression chamber while the machine is powered, always use lockout/tagout procedures before clearing jams, and ensure all operators complete manufacturer-specific training before operating the machine unsupervised. Position balers so that the feed area is visible from the operator station — blind spots invite accidents.
Cost and ROI: What to Expect
Industrial baler prices vary widely based on type, size, and automation level:
| Baler Type | Typical Price Range (USD) | Payback Period |
|---|---|---|
| Vertical baler (10–30 t) | $8,000 – $25,000 | 6–18 months |
| Semi-auto horizontal (40–80 t) | $30,000 – $80,000 | 12–24 months |
| Fully auto horizontal (60–120 t) | $60,000 – $180,000 | 12–30 months |
| Two-ram / channel baler | $120,000 – $350,000 | 18–36 months |
ROI drivers: The largest savings come from reduced transport costs (baled material ships at 3–5× the weight per truck vs. loose) and higher commodity prices (properly baled OCC sells for $120–180/tonne vs. $80–120 loose, depending on market conditions). A facility processing 20 tonnes/day of mixed recyclables typically recovers baler investment within 12–18 months through freight savings alone.
Frequently Asked Questions
What is the difference between a horizontal baler and a vertical baler?
A horizontal baler feeds material in from one end and ejects bales from the other, supporting continuous high-volume operation (5–30+ t/h). A vertical baler compresses material downward from the top, occupies a smaller footprint, and suits lower volumes (0.5–3 t/h). Horizontal models cost more but deliver higher throughput with less labour.
How much does an industrial baler cost?
Prices range from $8,000 for a small vertical baler to $350,000+ for a large two-ram automatic channel baler. Most mid-size recycling operations invest $30,000–$80,000 in a semi-automatic horizontal baler. Total cost of ownership over 10 years is typically 2–2.5× the purchase price when including electricity, wear parts, and maintenance.
What materials can an industrial baler process?
Common materials include OCC cardboard, mixed paper, plastic film (LDPE, HDPE), PET bottles, aluminium cans, steel scrap, textiles, non-woven fabrics, and agricultural waste (hay, straw, cotton). Each material requires specific press force and chamber configurations for optimal bale density.
How do I calculate the right baler size for my facility?
Start with your daily tonnage and divide by operating hours to get required hourly throughput. Add 20% headroom for growth and peak periods. Then match that number to baler throughput ratings. For example, 30 tonnes/day across 8 hours = 3.75 t/h → target a baler rated for 4.5+ t/h.
What are the energy costs of running an industrial baler?
A 37 kW semi-automatic horizontal baler running 8 hours per day consumes approximately 200–250 kWh daily. At an electricity rate of $0.10/kWh, that’s $20–25/day or roughly $6,000–7,500/year. VFD-equipped models reduce this by 25–40%, saving $1,500–3,000 annually.
How often does a baler need maintenance?
Daily visual inspections take 10–15 minutes. Weekly greasing and component checks take 30–60 minutes. Hydraulic oil filter changes are quarterly, and full oil replacement is annual. Cylinder seal replacement every 3–5 years is the most significant scheduled maintenance cost, typically $2,000–$5,000 including parts and labour.
Can one baler handle multiple material types?
Yes, if the baler has adjustable pressure settings and the materials don’t contaminate each other. Many MRFs use a single horizontal baler for OCC cardboard, mixed paper, and plastic film by switching pressure presets between material runs. However, baling metals requires reinforced chamber walls — a baler configured for cardboard should not process steel scrap.
What safety certifications should an industrial baler have?
At minimum, look for CE marking (required for EU markets), which covers the Machinery Directive 2006/42/EC. For North American installations, UL or CSA listing provides additional assurance. Key safety features include emergency stops accessible from all operator positions, light curtains on the feed opening, hydraulic pressure-relief valves, and lockout/tagout provisions compliant with OSHA 29 CFR 1910.147.
Your Next Step
Selecting the right industrial baler requires matching press force, throughput capacity, and automation level to your specific material mix and growth plans. Energycle’s engineering team provides free capacity assessments — share your daily tonnage, material types, and available floor space, and we will recommend a configuration with a detailed TCO projection. View our full baler range or contact us directly to start your assessment.
Related Resources
- Industrial Balers — Full Product Range
- Fully Automatic Horizontal Hydraulic Baler
- Semi-Automatic Horizontal Baler
- Industrial Cardboard & Paper Baler
- Vertical PET Bottle & Can Baler
- Vertical Fiber & Textile Baler
- Semi-Auto Waste Paper Baling Machine
- Galvanized Iron Wire for Balers
- Debaler Machine for Plastic Recycling
- Textile Shredder Machine Guide
- PET Bottle Washing Line Guide
- Plastic Shredder
- Plastic Granulator Machine
A plastic pelletizing machine melts shredded, washed, or densified plastic waste and reshapes it into uniform pellets — the standard raw material form that injection molders, extruders, and film blowers purchase and process. Pelletizing is the final value-adding step in plastic recycling: it converts low-value flakes or regrind into market-ready pellets worth $400–$1,200/ton depending on polymer type and quality. This guide covers every pelletizer type, real specifications, material-to-machine matching, cutting system selection, and a framework for specifying the right pelletizing line for your operation.
What Is a Plastic Pelletizing Machine?
A plastic pelletizing machine (also called a pelletizer or granulating extruder) melts plastic input material through a heated screw-and-barrel system, filters out contaminants via a screen changer, then pushes the melt through a die plate where a cutting system chops it into cylindrical or spherical pellets of 2–5 mm diameter. The pellets are cooled (by water or air), dried, and collected in bags or silos. Learn the fundamentals in our guide: What Is a Plastic Pelletizer and How Does It Work?
Key components of every pelletizing line:
- Feeding system — force feeder, crammer, or cutter compactor that densifies and feeds material into the extruder
- Extruder — single-screw or twin-screw barrel that melts, homogenizes, and pressurizes the plastic
- Screen changer — hydraulic or manual filter that removes contaminants (paper, metal, dirt) from the melt
- Die plate — perforated plate that shapes the melt into strands or directly into pellets
- Cutting system — strand cutter, water ring cutter, or underwater pelletizer that forms final pellet shape
- Cooling and drying — water bath, air cooling, or centrifugal dryer that solidifies and dries pellets
Types of Plastic Pelletizing Machines
Single-Screw Pelletizer
The most common type for recycling applications. A single rotating screw inside a heated barrel melts and conveys plastic forward. Simple, reliable, and lower cost than twin-screw systems. Best for clean, pre-sorted feedstock (PE, PP, PET flakes, PS). Throughput: 100–1,500 kg/h. See our single-screw pelletizing machine range.
Twin-Screw Pelletizer
Two co-rotating or counter-rotating screws provide superior mixing, venting, and degassing. Required for materials that need intensive compounding (color concentrates, filled plastics, engineering plastics) or that contain high moisture or volatile content. Higher cost (1.5–2.5× single-screw) but produces better pellet quality for demanding applications. Throughput: 200–3,000 kg/h.
Cutter Compactor Pelletizer
Integrates a high-speed cutter compactor (agglomerator) directly before the extruder. The cutter compactor shreds, densifies, and pre-heats film, fiber, and lightweight materials through friction — then feeds directly into the extruder barrel. This eliminates the need for a separate agglomerator or densifier, saving floor space and energy. Ideal for PE/PP film, woven bags, nonwoven fabric, and raffia. See our cutter compactor pelletizing line.
Two-Stage Pelletizer
Uses two extruders in series: the first melts and filters, the second homogenizes and builds pressure for pelletizing. The two-stage design provides extra melt filtration, better degassing (two venting zones), and more consistent melt quality. Best for heavily printed film, post-consumer mixed plastics, and materials with high contamination. Higher investment but produces premium-quality pellets.
Pelletizer Type Comparison
| Type | Throughput | Motor Power | Best For | Relative Cost |
|---|---|---|---|---|
| Single-Screw | 100–1,500 kg/h | 22–250 kW | Clean PE/PP/PET flakes, regrind | 1× (baseline) |
| Twin-Screw | 200–3,000 kg/h | 37–400 kW | Compounding, engineering plastics, high-moisture | 1.5–2.5× |
| Cutter Compactor | 200–1,500 kg/h | 55–300 kW | PE/PP film, woven bags, nonwoven, raffia | 1.2–1.8× |
| Two-Stage | 300–2,000 kg/h | 75–400 kW | Printed film, post-consumer mix, high contamination | 1.5–2.0× |
Cutting Systems: Strand vs. Water Ring vs. Underwater
The cutting system determines pellet shape, quality, and throughput. Choosing the right one depends on your polymer type, required pellet geometry, and production speed. For an in-depth comparison, see strand vs. underwater pelletizing for rPET.
| Cutting System | Pellet Shape | Best For | Throughput Range | Pros | Cons |
|---|---|---|---|---|---|
| Strand Cutting | Cylindrical | PE, PP, PET, PS — most recycling | 100–1,500 kg/h | Simple, low cost, easy maintenance | Strand breakage with low-melt-strength materials |
| Water Ring Cutting | Semi-spherical | PE, PP — especially film recycling | 200–1,500 kg/h | Compact, no strand handling, consistent pellets | Not ideal for high-melt-flow materials |
| Underwater (UWP) | Spherical | PET, PA, TPE, engineering plastics | 500–5,000+ kg/h | Perfect pellet shape, high-speed, dust-free | Expensive, complex, higher maintenance |
See our water ring pelletizing system for PP/PE woven bag applications.
Material-to-Pelletizer Matching
Different plastics require different extruder configurations, temperatures, and cutting systems. Here is our recommendation based on 500+ installations:
| Material | Recommended Pelletizer | Cutting System | Key Notes |
|---|---|---|---|
| PE Film (LDPE/LLDPE) | Cutter Compactor + Single-Screw | Water ring or strand | Film needs densifying; cutter compactor is ideal. See PE/PP film pelletizer |
| PP Woven Bags / Raffia | Cutter Compactor + Single-Screw | Water ring | High bulk — compaction essential before extrusion |
| PET Bottle Flakes | Single-Screw (with crystallizer/dryer) | Strand or underwater | Must dry to <50 ppm moisture; IV loss control critical. See PET pelletizer |
| Rigid HDPE/PP (crates, drums) | Single-Screw | Strand | Easy to pelletize; force-feeder sufficient. See rigid PP/HDPE pelletizer |
| Nonwoven / Meltblown | Cutter Compactor + Single-Screw | Water ring | Ultra-light material requires aggressive densification. See nonwoven pelletizing line |
| PA / Nylon | Twin-Screw (with vacuum venting) | Underwater or strand | Hygroscopic — needs drying + vacuum degassing |
| Mixed Post-Consumer | Two-Stage | Strand or water ring | High contamination requires double filtration + degassing |
For detailed material compatibility, read what types of plastics can be processed with a pelletizer.
Pelletizer Specifications Reference
Representative specifications from Energycle’s single-screw pelletizer range:
| Model | Screw Diameter | L/D Ratio | Throughput | Motor Power | Typical Application |
|---|---|---|---|---|---|
| SJ-65 | Ø65 mm | 28:1–33:1 | 80–150 kg/h | 22–37 kW | Small-batch, rigid regrind |
| SJ-85 | Ø85 mm | 28:1–33:1 | 150–300 kg/h | 37–55 kW | PE/PP film, woven bags |
| SJ-100 | Ø100 mm | 28:1–33:1 | 250–500 kg/h | 55–90 kW | Medium recycling lines |
| SJ-120 | Ø120 mm | 28:1–33:1 | 400–800 kg/h | 90–132 kW | High-volume recycling |
| SJ-150 | Ø150 mm | 28:1–33:1 | 600–1,200 kg/h | 132–200 kW | Large industrial lines |
| SJ-180 | Ø180 mm | 28:1–33:1 | 800–1,500 kg/h | 200–250 kW | Maximum throughput |
Visit our plastic pelletizer product page for complete specifications and configuration options. For pricing guidance, see plastic pelletizer machine cost factors and budget vs. high-end pelletizer comparison.
5-Step Selection Framework
Step 1: Define Input Material
Identify polymer type (PE, PP, PET, PS, PA, etc.), form (film, flake, regrind, fiber), contamination level (clean in-house vs. dirty post-consumer), and moisture content. This determines extruder type, number of stages, and whether you need a cutter compactor or pre-dryer.
Step 2: Set Throughput Target
Calculate required pellet output in kg/h. Match upstream washing/drying line output to pelletizer capacity. Always size the pelletizer 20–30% above your current throughput for surge capacity and future growth. Running a pelletizer at 80% of rated capacity extends screw and barrel life significantly.
Step 3: Choose Cutting System
Strand cutting for simplicity and most recycling applications. Water ring for film recyclers wanting compact, consistent pellets. Underwater for PET, engineering plastics, and high-speed production where pellet shape matters for end customers.
Step 4: Specify Pellet Quality
Define target pellet size (typically 3–4 mm), acceptable moisture content (<0.5% for most applications, <50 ppm for PET), color consistency requirements, and maximum contamination levels. These specifications determine screen changer mesh size, number of filtration stages, and cooling/drying system design.
Step 5: Calculate ROI
Pellets sell for $400–$1,200/ton depending on polymer and quality — 2–5× the value of washed flakes. A 500 kg/h pelletizer running 8 hours/day, 300 days/year produces 1,200 tons annually. At $200/ton margin over flake value, that is $240,000/year gross margin from a machine investment of $80,000–$200,000 — payback in 6–12 months.
Maintenance Essentials
- Daily: Inspect die plate for blocked holes; clean screen changer; check water temperature in cooling system
- Weekly: Verify screw torque and motor amperage (rising amps indicates barrel wear); inspect pellet cutter blades
- Monthly: Lubricate gearbox; check heater band function on each zone; inspect screen changer seals
- Every 2,000–4,000 hours: Measure screw and barrel wear (replace when clearance exceeds 0.5 mm per side)
- Annually: Full inspection of screw, barrel, die plate, gearbox, and electrical systems
For complete maintenance programs, see our pelletizer maintenance checklist and pelletizing methods guide.
Getting Started with Energycle
Energycle manufactures plastic pelletizing machines from 80 kg/h laboratory units to 1,500 kg/h production lines, plus complete turnkey recycling systems from washing through pelletizing. We provide:
- Free material testing — send us your plastic samples and we test pellet quality on our machines
- Custom line design — extruder, cutting system, and feeding system configured for your specific material and throughput
- Installation and training — on-site commissioning and operator training included
- After-sales support — spare screws, barrels, die plates, and cutter blades with fast delivery
Contact our engineering team with your material type, throughput requirement, and desired pellet specifications — we will recommend the right configuration and provide a quotation within 48 hours.
Frequently Asked Questions
How much does a plastic pelletizing machine cost?
Small single-screw pelletizers (100–200 kg/h) cost $25,000–$60,000. Mid-range systems (300–800 kg/h) cost $60,000–$150,000. Large production lines (800–1,500 kg/h) range from $150,000–$350,000. Complete turnkey lines including washing, drying, and pelletizing cost $200,000–$800,000. Cutter compactor systems add 20–50% over basic single-screw models.
What is the difference between a pelletizer and a granulator?
A pelletizer melts plastic and extrudes it through a die to form uniform pellets — it changes the physical form of the material through heating. A granulator mechanically cuts solid plastic into small pieces (regrind) without melting. Pellets are market-ready raw material; regrind is an intermediate product. See our detailed comparison: pelletizer vs. granulator.
Which pelletizer type is best for PE film recycling?
A cutter compactor pelletizer is the best choice for PE/PP film. The integrated cutter compactor densifies lightweight film through friction heating before feeding it into the extruder — solving the biggest challenge in film recycling (low bulk density). A water ring cutting system produces consistent, dust-free pellets. Expect 200–1,500 kg/h throughput depending on model size.
What throughput can I expect from a plastic pelletizer?
Throughput depends on screw diameter, motor power, and material type. A Ø65 mm single-screw handles 80–150 kg/h; a Ø120 mm handles 400–800 kg/h; a Ø180 mm reaches 800–1,500 kg/h. Film materials pelletize faster than rigid flakes due to easier melting. Actual throughput is typically 75–85% of rated maximum during sustained production.
How do I choose between strand cutting and water ring cutting?
Strand cutting is simpler and cheaper — melt exits the die as strands, passes through a water bath, and is cut by a rotary blade. Best for rigid plastics with good melt strength. Water ring cutting cuts melt directly at the die face in a water chamber — produces rounder pellets with no strand-handling issues. Best for film-grade PE/PP where strand breakage would be a problem.
Can I pelletize PET bottle flakes?
Yes, but PET requires special handling: flakes must be crystallized and dried to below 50 ppm moisture before extrusion (PET degrades rapidly with moisture at melt temperatures). Use a single-screw or twin-screw pelletizer with vacuum venting. Strand cutting or underwater pelletizing works best. IV (intrinsic viscosity) loss should be monitored — target less than 0.02 dL/g drop through the extruder. See our PET flake pelletizer sizing guide.
What maintenance does a pelletizer require?
Daily: clean screen changer and inspect die plate. Weekly: check motor amperage and cutter blade sharpness. Monthly: lubricate gearbox and inspect heater bands. Every 2,000–4,000 hours: measure screw and barrel wear. The screw and barrel are the highest-cost wear items — budget $3,000–$15,000 for replacement depending on size. Running clean material and maintaining proper temperatures extends wear life 2–3×.
Is plastic pelletizing profitable?
Yes — pelletizing adds $200–$600/ton in value over washed flakes. A 500 kg/h line running one shift (8h/day, 300 days/year) produces 1,200 tons of pellets annually. At a conservative $200/ton value-add, gross margin is $240,000/year from a $100,000–$200,000 equipment investment. Most operations achieve payback within 6–12 months. Post-consumer recycled pellets with food-grade certification command even higher premiums.
Related Resources
- Plastic Pelletizers — Product Range
- Single-Screw Plastic Pelletizing Machine
- PP/PE Film Pelletizing Machine
- Rigid PP/HDPE Pelletizing Machine
- Water Ring Pelletizing System
- PET Flake Single-Screw Pelletizer
- Single-Screw Pelletizer for PET: Sizing Guide
- Cutter Compactor Pelletizing Line
- PP Meltblown Nonwoven Pelletizing Line
- Strand vs. Underwater Pelletizing for rPET
- Pelletizer Machine Cost Factors
- Budget vs. High-End Pelletizer Comparison
- Pelletizer Maintenance Checklist
- Pelletizer vs. Granulator Differences
- What Plastics Can Be Pelletized?
- Plastic Recycling Machine: Complete Guide
A tire recycling machine transforms end-of-life tires — passenger car, truck, OTR (off-the-road), and industrial — into reusable materials: crumb rubber, rubber powder, steel wire, and fiber. With an estimated 1.5 billion waste tires generated globally each year and landfill bans tightening across North America, Europe, and Asia, tire recycling is both an environmental necessity and a profitable business. This guide covers every machine type in the tire recycling process, real specifications, output products and their markets, and a step-by-step framework for building or upgrading a tire recycling line.
What Is a Tire Recycling Machine?
A tire recycling machine is any equipment used to break down waste tires into reusable raw materials. No single machine processes a whole tire into finished product — tire recycling requires a sequence of specialized machines, each handling a specific stage: debeading (removing steel bead wire), shredding (primary size reduction), granulating (secondary size reduction), steel separation, fiber separation, and grinding (fine powder production). The term “tire recycling machine” typically refers to the complete line or to the primary shredder that anchors the system.
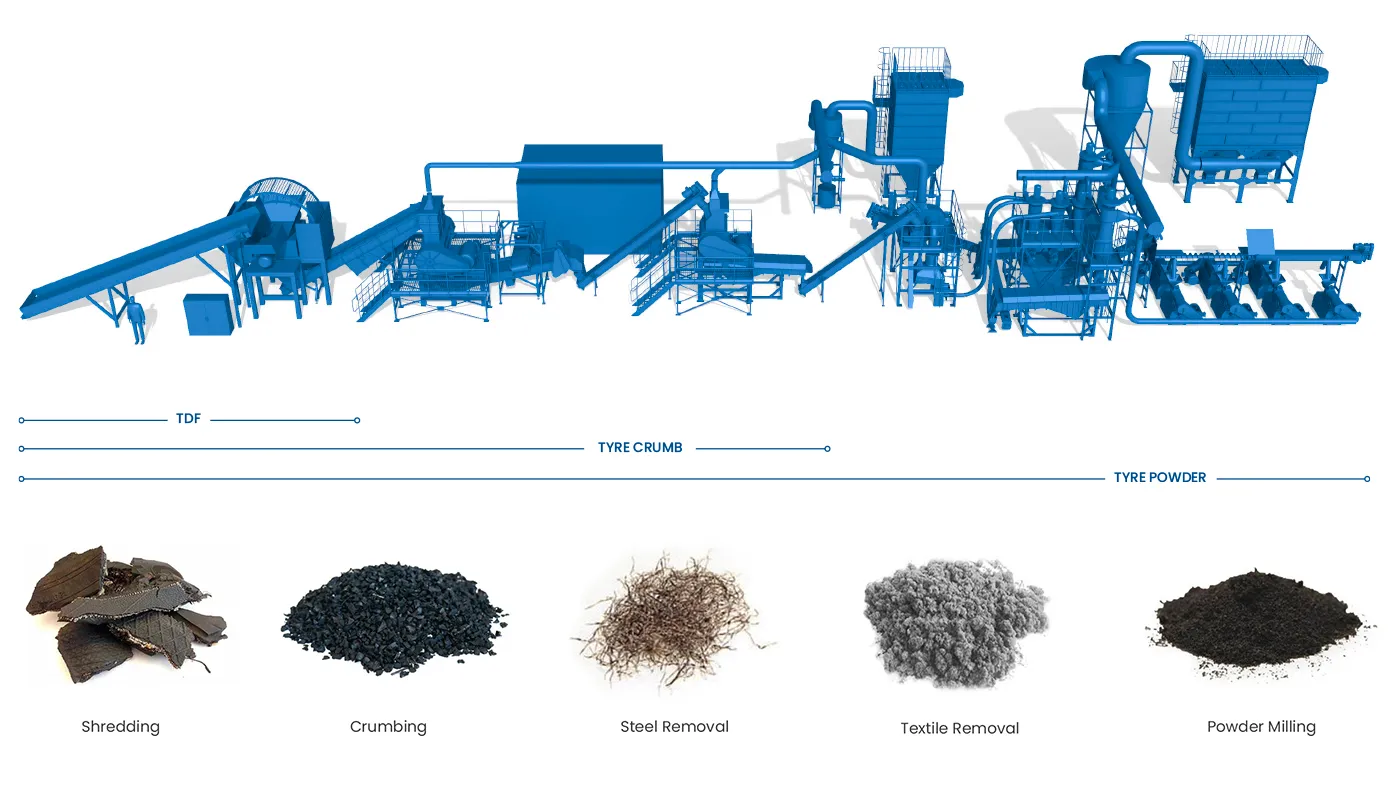
The Tire Recycling Process: Step by Step
Understanding the complete process helps you specify the right equipment for each stage. Here is the standard mechanical tire recycling process used in ambient-temperature processing:
Stage 1: Collection and Inspection
Waste tires arrive from tire dealers, auto shops, fleet operators, and municipal collection points. Inspect for contamination (rims still mounted, excessive mud, chemical contamination) and sort by type: passenger car tires (PCT), truck and bus tires (TBT), and OTR tires each require different processing parameters due to size and steel content differences.
Stage 2: Debeading
A tire debeading machine extracts the steel bead wire from each tire sidewall. This step is critical: bead wire left in the tire damages shredder blades and contaminates the rubber output. A single-hook debeader processes 60–120 passenger tires per hour. Removing the bead wire also makes subsequent shredding 30–40% more energy-efficient because the shredder doesn’t need to cut through hardened steel cable.
Stage 3: Sidewall Cutting (Optional)
For large truck and OTR tires, a tire cutting machine separates sidewalls from the tread. This reduces the size of material entering the primary shredder and allows sidewalls and treads to be processed separately or sold as-is for specific applications (e.g., sidewall rubber for conveyor belt liners). Learn more about why sidewall cutting matters in tire recycling.
Stage 4: Primary Shredding
The tire shredder is the core machine in any tire recycling line. A low-speed, high-torque double-shaft shredder tears whole tires (or pre-cut sections) into rough chips of 50–100 mm. Primary shredders for tire recycling typically use 30–110 kW motors and process 500–3,000 kg/h depending on tire type and machine size. The output — called tire-derived fuel (TDF) chips at this stage — already has commercial value as an alternative fuel.
Stage 5: Secondary Shredding / Granulation
A tire granulator reduces the 50–100 mm chips to 5–20 mm granules. At this stage, steel wire liberates from the rubber matrix and can be removed by magnetic separators. Textile fiber also separates and is removed by air classifiers or vibrating screens. The output is a mix of rubber granules, loose steel wire, and fiber. See our detailed guide on waste tire granulators and output specifications.
Stage 6: Steel and Fiber Separation
Overband magnetic separators and magnetic drums remove steel wire fragments from the rubber granules — typically achieving 99%+ steel removal. Air classifiers and vibrating screens remove textile fiber (nylon, polyester cord). The separated steel sells as scrap metal ($100–$200/ton); fiber can be used as insulation or fuel supplement.
Stage 7: Fine Grinding (Optional)
For higher-value applications, a rubber pulverizer/grinder further reduces granules to fine rubber powder (40–80 mesh / 0.2–0.4 mm). Fine rubber powder commands premium prices ($300–$600/ton) for use in molded rubber products, asphalt modification, and sports surfacing. Cryogenic grinding (freezing rubber with liquid nitrogen before milling) produces even finer powder but adds $50–$100/ton in processing cost.
Tire Recycling Machine Types
Here is every machine type used in a tire recycling line, with specifications from Energycle’s manufacturing range:
| Machine | Function | Throughput | Motor Power | Output Size |
|---|---|---|---|---|
| Tire Debeader | Extract bead wire from tire sidewall | 60–120 tires/h | 7.5–15 kW | Whole tire (wire removed) |
| Tire Cutter | Cut sidewalls from tread | 40–80 tires/h | 5.5–11 kW | Sidewall strips + tread rings |
| Primary Shredder (Double-Shaft) | Shred whole/cut tires to chips | 500–3,000 kg/h | 30–110 kW | 50–100 mm chips |
| Tire Granulator | Reduce chips to granules, liberate wire | 300–2,000 kg/h | 22–75 kW | 5–20 mm granules |
| Magnetic Separator | Remove steel wire from granules | Matches line speed | 1.5–4 kW | Clean granules + steel wire |
| Air Classifier / Fiber Separator | Remove textile fiber from granules | Matches line speed | 3–7.5 kW | Clean granules + fiber |
| Rubber Pulverizer | Grind granules to fine powder | 200–800 kg/h | 37–75 kW | 40–80 mesh powder |
Output Products and Market Value
A tire recycling line produces multiple revenue streams. Understanding output products and their markets helps you decide how far to process and which equipment stages to invest in:
| Output Product | Size | Market Price | Applications |
|---|---|---|---|
| TDF Chips | 50–100 mm | $30–$80/ton | Cement kiln fuel, power plant fuel (replaces coal) |
| Crumb Rubber (coarse) | 5–20 mm | $120–$250/ton | Playground surfaces, sports tracks, landscaping mulch |
| Crumb Rubber (fine) | 1–5 mm | $200–$400/ton | Asphalt rubber (road paving), molded products, athletic fields |
| Rubber Powder | 40–80 mesh | $300–$600/ton | Rubber compound additive, waterproofing, automotive parts |
| Steel Wire | — | $100–$200/ton | Steel scrap recycling (foundries, mini-mills) |
| Textile Fiber | — | $20–$50/ton | Insulation, fuel supplement, geotextile filler |
A typical passenger car tire weighs 8–10 kg and contains approximately 70% rubber, 15% steel, and 15% textile fiber by weight. Processing 1,000 tires produces roughly 7 tons of rubber, 1.5 tons of steel, and 1.5 tons of fiber.
TDF vs. TDA vs. Crumb Rubber: End-Product Comparison
The three main product categories from tire recycling serve very different markets. Your processing depth determines which products you can sell:
| Product | Processing Required | Capital Investment | Revenue/ton | Market Demand |
|---|---|---|---|---|
| TDF (Tire-Derived Fuel) | Shredding only (1 stage) | Low ($80K–$200K) | $30–$80 | Stable — cement kilns, power plants |
| TDA (Tire-Derived Aggregate) | Shredding + screening | Low-Medium ($100K–$250K) | $50–$120 | Growing — civil engineering fills, drainage |
| Crumb Rubber | Shredding + granulation + separation | Medium-High ($200K–$600K) | $120–$600 | Strong — sports surfaces, asphalt, molded goods |
Our recommendation for new operations: Start with TDF production (lowest capital, immediate revenue), then add granulation and separation equipment as cash flow permits. The shredder purchased for TDF production becomes stage 1 of the crumb rubber line — zero wasted investment. For detailed market analysis, see our guide on tire recycling markets: TDF vs. TDA vs. CRM.
Passenger Car vs. Truck vs. OTR Tire Processing
Different tire types require different equipment sizing and processing approaches:
| Parameter | Passenger Car Tire | Truck/Bus Tire | OTR Tire |
|---|---|---|---|
| Weight | 8–10 kg | 40–70 kg | 200–4,000 kg |
| Diameter | 550–700 mm | 900–1,200 mm | 1,800–4,000 mm |
| Steel Content | 10–15% | 15–25% | 10–20% |
| Debeading | Standard single-hook | Heavy-duty debeader | Hydraulic OTR debeader |
| Pre-Cutting | Optional | Recommended | Required |
| Shredder Size | 30–55 kW | 55–90 kW | 90–200+ kW |
| Throughput (shredder) | 500–2,000 kg/h | 800–2,500 kg/h | Custom per project |
Complete Tire Recycling Line Configurations
Basic TDF Line (Lowest Investment)
Debeader → primary shredder → magnetic separator → screening. Output: 50–100 mm TDF chips + steel wire. Throughput: 500–2,000 kg/h. Investment: $80,000–$200,000. Payback: 12–24 months at 8 hours/day operation.
Crumb Rubber Line (Medium Investment)
Debeader → primary shredder → granulator → magnetic separator → air classifier → vibrating screen. Output: 1–5 mm clean crumb rubber + steel + fiber. Throughput: 300–1,500 kg/h of finished crumb. Investment: $200,000–$600,000. Payback: 8–18 months. Watch our tire recycling line trial run.
Fine Rubber Powder Line (Highest Value)
Full crumb rubber line + rubber pulverizer + fine screening + packaging. Output: 40–80 mesh rubber powder. Throughput: 200–800 kg/h of powder. Investment: $400,000–$1,000,000+. Payback: 12–24 months. Highest revenue per ton but requires larger capital and more skilled operators.
5-Step Selection Framework
Step 1: Define Your Feedstock
Passenger car tires, truck tires, or OTR tires? Mixed or single type? Expected daily/monthly volume in tons? Tire type determines every machine specification in the line — a 500 kg/h passenger car line is a completely different setup from a 500 kg/h truck tire line.
Step 2: Choose Your End Product
TDF chips (simplest), crumb rubber (best balance of investment vs. revenue), or fine rubber powder (highest value, highest investment)? Research local market demand — a crumb rubber line is pointless if no buyers exist within economical shipping distance. Identify at least 2–3 potential buyers before investing.
Step 3: Size Your Line
Calculate required throughput from your tire supply volume. A facility processing 50 tons/day of passenger car tires needs approximately 3,000–4,000 kg/h primary shredding capacity (accounting for 8-hour shifts and 80% uptime). Always size equipment for peak capacity plus 20% margin.
Step 4: Plan Your Layout
A complete crumb rubber line requires 500–2,000 m² of covered space plus outdoor tire storage area. Plan material flow: tire receiving → debeading → shredding → granulation → separation → screening → product storage. Include space for maintenance access, spare parts, and future expansion.
Step 5: Calculate ROI
Revenue = (rubber tonnage × rubber price) + (steel tonnage × steel price) + tipping fees (if charged for tire acceptance). Costs = equipment depreciation + electricity + labor + maintenance + rent. Most tire recycling operations charge $1–$3 per tire as a tipping/acceptance fee — this alone can cover 30–50% of operating costs. A 1,000 kg/h crumb rubber line typically generates $300,000–$600,000 annual gross revenue with 40–60% margins.
Maintenance Essentials
Tire recycling equipment operates in harsh conditions — abrasive rubber, embedded steel wire, and high torque loads. A disciplined maintenance program is non-negotiable:
- Daily: Inspect shredder blades for chipping, clear jammed material, check oil levels on hydraulic systems
- Weekly: Verify magnetic separator strength, check conveyor belt tension and alignment, inspect granulator screens for wear holes
- Monthly: Lubricate all bearings, inspect electrical connections and motor temperatures, check shredder shaft seals
- Every 500–1,000 hours: Rotate or replace shredder blades (tire processing wears blades 2–3× faster than standard plastic shredding due to steel wire contact)
- Annually: Full machine inspection, replace worn screens and liners, check gearbox oil, verify safety systems
Blade costs are the largest maintenance expense — budget $5,000–$15,000 annually for a mid-size line. Using wear-resistant blade materials (D2, DC53, or hardfacing) extends blade life 40–80%. See our shredder blade metallurgy guide.
Getting Started with Energycle
Energycle manufactures complete tire recycling machine lines — from debeading through shredding, granulation, separation, and grinding. With installations across Africa, Southeast Asia, the Middle East, and South America, we provide:
- Free project consultation — tell us your tire supply, target product, and budget; we design the optimal line configuration
- Turnkey line supply — all machines, conveyors, electrical panels, and controls from a single source
- Installation and commissioning — our engineers install on-site and train your operators
- Spare parts and blade supply — fast delivery of wear parts to minimize downtime
Contact our engineering team with your tire type, daily volume, and target end product — we will design a line and provide a complete quotation within one week.
Frequently Asked Questions
How much does a tire recycling machine cost?
A basic TDF shredding line (debeader + shredder + magnetic separator) costs $80,000–$200,000. A complete crumb rubber line costs $200,000–$600,000. A fine rubber powder line with pulverizer costs $400,000–$1,000,000+. Individual machines: tire shredders $30,000–$150,000, debeaders $8,000–$25,000, granulators $20,000–$80,000. Payback periods range from 8–24 months depending on configuration and local market prices.
What is the tire recycling process?
The standard mechanical tire recycling process has 6–7 stages: (1) collection and sorting, (2) debeading (steel bead wire removal), (3) optional sidewall cutting, (4) primary shredding to 50–100 mm chips, (5) granulation to 5–20 mm, (6) magnetic and air separation to remove steel wire and fiber, and (7) optional fine grinding to 40–80 mesh powder. Each stage adds value to the output product.
Is tire recycling profitable?
Yes — tire recycling generates revenue from multiple streams: crumb rubber ($120–$600/ton depending on fineness), steel wire ($100–$200/ton), tipping fees ($1–$3 per tire accepted), and fiber ($20–$50/ton). A mid-size crumb rubber operation processing 1,000 kg/h typically generates $300,000–$600,000 annual gross revenue with 40–60% profit margins after operating costs.
What size shredder do I need for tire recycling?
For passenger car tires: a 30–55 kW double-shaft shredder handles 500–2,000 kg/h. For truck tires: 55–90 kW for 800–2,500 kg/h. For OTR tires: 90–200+ kW, custom-engineered. Always size for peak volume plus 20% margin, and account for 80% uptime (maintenance, shift changes, feeding gaps).
What is the difference between TDF, TDA, and crumb rubber?
TDF (tire-derived fuel) is coarsely shredded tire chips (50–100 mm) burned as alternative fuel in cement kilns. TDA (tire-derived aggregate) is shredded tire pieces used as lightweight fill in civil engineering projects. Crumb rubber is finely granulated rubber (1–5 mm) used in sports surfaces, asphalt modification, and molded products. Each requires progressively more processing equipment but commands higher prices.
Can I recycle truck tires and car tires on the same line?
Yes, but the line must be sized for the larger tire. A shredder designed for truck tires easily handles passenger car tires, but not vice versa. The main difference is debeading — truck tires need a heavy-duty debeader. Feed rate drops when processing larger tires because each tire takes longer to shred. Many operators process car tires and truck tires in separate batches.
How long do tire shredder blades last?
Tire shredder blades last 500–1,000 operating hours before needing rotation or replacement — roughly 2–4 months at 8 hours/day. Steel bead wire in tires causes 2–3× faster blade wear compared to standard plastic shredding. D2 and DC53 tool steel blades offer the best cost-to-life ratio; tungsten carbide-tipped blades last longer but cost 4–6× more upfront.
What permits do I need for tire recycling?
Requirements vary by jurisdiction but typically include: waste processing/recycling license, environmental permit (air emissions, noise, water discharge), fire safety clearance (tire storage is a significant fire risk), and business operating permits. Some regions also require tire storage limits (maximum number of tires on-site). Consult your local environmental agency before investing in equipment.
Related Resources
- Tire Recycling Machine — Product Range
- Tire Shredder
- Tire Recycling Markets: TDF vs TDA vs CRM Specs
- Waste Tire Granulators: How They Work
- Tire Granulators: Steel Wire Separation & Crumb Rubber Specs
- Single Hook Tire Wire Debeading Machine
- Waste Tire Cutting Machine
- Tire Rubber Recycling Pulverizing Grinder
- Why Is the Sidewall Cut During Tire Recycling?
- Waste Tire Recycling Line Trial Run
- Double Shaft Shredder for Plastic, Metal & Tire
- Shredder Blade Metallurgy Guide
- Plastic Recycling Machine: Complete Guide
An eddy current separator (ECS) recovers non-ferrous metals — aluminum cans, copper wire, brass fittings, zinc die-castings — from mixed waste streams by exploiting electromagnetic repulsion. If your recycling line processes municipal solid waste (MSW), auto shredder residue (ASR), electronic scrap, incineration bottom ash (IBA), or PET bottle flakes contaminated with aluminum closures, an eddy current separator is how you pull the non-ferrous value out. This guide covers the physics behind the technology, every ECS type Energycle offers, real operating parameters, and a step-by-step framework for specifying the right separator for your application.
What Is an Eddy Current Separator?
An eddy current separator is an electromagnetic sorting machine that separates non-ferrous metals from non-metallic materials on a conveyor belt. The core mechanism: a high-speed magnetic rotor spinning inside a non-metallic shell drum generates rapidly alternating magnetic fields. When conductive metals pass through these fields, electric currents (eddy currents) are induced inside the metal pieces, creating their own magnetic fields that oppose the rotor’s field. The resulting repulsive force launches non-ferrous metals forward off the belt, while non-conductive materials (plastic, glass, wood, paper) simply fall off the belt end by gravity.
The separation force depends on a material’s conductivity-to-density ratio. Aluminum (high conductivity, low density) separates most easily. Copper and brass (high conductivity but higher density) require stronger fields or slower belt speeds. Stainless steel and lead respond poorly to eddy current separation due to low conductivity or very high density.
How Does an Eddy Current Separator Work?
The working principle follows Faraday’s Law of electromagnetic induction and Lenz’s Law. Here is the step-by-step process:
Step 1: Material Feeding
Pre-sorted material (ferrous metals already removed by magnetic drum or overband separator) feeds onto the ECS conveyor belt as a thin, uniform layer. A vibratory feeder upstream ensures monolayer distribution — stacked particles reduce separation efficiency by 30–50%.
Step 2: Magnetic Field Exposure
As material reaches the head pulley, it passes over the magnetic rotor spinning at 2,000–5,000 RPM inside a stationary shell. The rotor contains alternating N-S-N-S permanent magnets (typically NdFeB rare-earth) arranged around its circumference. This creates a rapidly changing magnetic field at the belt surface.
Step 3: Eddy Current Induction
When a conductive metal piece enters this alternating field, circulating electric currents (eddy currents) are induced within the metal. Per Lenz’s Law, these eddy currents generate their own magnetic field that opposes the external field — creating a repulsive (Lorentz) force that pushes the metal piece away from the rotor.
Step 4: Trajectory Separation
Three forces act on each particle simultaneously: (1) the eddy current repulsive force (forward/upward), (2) belt conveyor momentum (forward), and (3) gravity (downward). Non-ferrous metals, receiving the additional repulsive kick, follow a longer trajectory and land in the “metals” collection bin. Non-conductive materials simply drop off the belt end into a separate “non-metals” bin. An adjustable splitter plate between the two bins lets operators fine-tune the cut point.
Types of Eddy Current Separators
Different applications require different ECS designs. The main distinction is rotor geometry — concentric vs. eccentric — which determines the magnetic field pattern and optimal particle size range.
Concentric Pole Rotor ECS
The magnetic rotor is centered inside the shell drum. This produces a uniform, symmetrical field pattern ideal for standard recycling applications where particle sizes range from 20–150 mm. Concentric ECS units are the industry workhorse — used in MSW recycling, construction & demolition (C&D) waste, auto shredder residue, and general scrap processing. They offer reliable separation at high throughput with lower maintenance costs.
Eccentric Pole Rotor ECS
The magnetic rotor is offset (eccentric) inside the shell, creating an intense but localized field zone. This concentrates maximum magnetic energy at the separation point, making eccentric ECS units effective for fine particles down to 5 mm. Applications include IBA (incinerator bottom ash) processing, zorba/zurik sorting, WEEE (waste electrical and electronic equipment) recovery, and fine aluminum recovery from glass cullet. Our high-recovery ECS for fine aluminum uses this design.
High-Frequency ECS
Uses more magnetic poles (typically 18–30 poles vs. 12–16 on standard units) and higher rotor speeds to create rapid field alternation. This design targets the smallest non-ferrous particles (5–20 mm) where standard concentric units lose effectiveness. High-frequency ECS is essential for fine fraction processing in IBA plants, wire-chopping lines, and small WEEE recycling.
Wet Eddy Current Separator
Processes material in a water slurry rather than on a dry belt. Used where the feed is already wet (e.g., slag quench water, heavy media plant tailings) or where dust control is critical. Less common than dry ECS but necessary in specific metallurgical and mining applications.
Eddy Current Separator Type Comparison
| Type | Particle Size Range | Rotor Speed | Poles | Best Applications | Recovery Rate |
|---|---|---|---|---|---|
| Concentric (Standard) | 20–150 mm | 2,000–3,500 RPM | 12–16 | MSW, C&D, auto shredder, general scrap | 90–95% |
| Eccentric | 5–50 mm | 3,000–5,000 RPM | 14–22 | IBA, WEEE, zorba/zurik, fine aluminum | 85–93% |
| High-Frequency | 5–20 mm | 3,500–5,000 RPM | 18–30 | Fine fraction IBA, wire chopping, small WEEE | 80–90% |
| Wet | 5–80 mm | 1,500–3,000 RPM | 12–18 | Slag processing, wet mining tailings | 75–88% |
Key Operating Parameters
Five parameters determine eddy current separator performance. Optimizing these based on your specific material stream is the difference between 70% and 95% recovery rates.
1. Rotor Speed (RPM)
Higher rotor speed increases field alternation frequency and repulsive force — but only up to a point. Beyond the optimal RPM for a given particle size, performance plateaus or drops because particles receive too-brief field exposure. Typical operating range: 2,000–5,000 RPM. Start at 3,000 RPM and adjust based on recovery results. Fine particles need higher RPM; large aluminum cans separate well at lower speeds.
2. Belt Speed
Belt speed controls three factors: material burden depth (faster = thinner layer), dwell time in the magnetic field (faster = less exposure), and particle trajectory after separation. Optimal belt speed creates a single-particle-thick layer without stacking. Typical range: 1.5–3.0 m/s. Increase belt speed for high-throughput applications; decrease for fine-fraction recovery.
3. Splitter Position
The adjustable divider between metal and non-metal collection bins. Moving the splitter closer to the belt increases metal purity but reduces recovery; moving it further away increases recovery but allows more non-metal contamination. Set the splitter position based on whether your priority is maximum recovery (recycling revenue) or maximum purity (downstream process requirement).
4. Feed Layer Uniformity
The single most overlooked parameter. Stacked material blocks magnetic field access to lower layers, cutting recovery by 30–50%. Use a vibratory feeder to spread material into a uniform monolayer before it reaches the ECS head pulley. For wet or sticky material, install a pre-screening stage to remove fines that cause bridging.
5. Ferrous Pre-Removal
Ferrous metals (steel, iron) must be removed before the ECS. Steel pieces attract to the magnetic rotor shell, wrapping around it and damaging the belt, reducing non-ferrous separation effectiveness, and causing costly downtime. Always install a magnetic separator upstream — overband magnets, magnetic drums, or pulley magnets remove 99%+ of ferrous contamination.
Material Separation Performance
Not all non-ferrous metals separate equally. The governing factor is the conductivity-to-density ratio (σ/ρ) — higher ratios produce stronger separation forces. Here is how common materials rank:
| Material | Conductivity (MS/m) | Density (kg/m³) | σ/ρ Ratio | ECS Separation |
|---|---|---|---|---|
| Aluminum | 37.7 | 2,700 | 14.0 | Excellent — primary target metal |
| Magnesium | 22.6 | 1,740 | 13.0 | Excellent |
| Copper | 59.6 | 8,960 | 6.7 | Good — needs slower belt or higher RPM |
| Brass | 15.9 | 8,500 | 1.9 | Moderate — larger pieces only |
| Zinc | 16.6 | 7,130 | 2.3 | Moderate |
| Lead | 4.8 | 11,340 | 0.4 | Poor — density too high |
| Stainless Steel | 1.4 | 7,900 | 0.2 | Very poor — use sensor-based sorting |
This table explains why aluminum cans are the easiest material to recover with an ECS (highest σ/ρ ratio), while stainless steel requires sensor-based sorting technologies instead.
Specifications Reference
Energycle manufactures eddy current separators in working widths from 600 mm to 2,000 mm. Here are representative specifications across our range:
| Model | Belt Width | Throughput | Motor Power | Rotor Diameter | Rotor Speed |
|---|---|---|---|---|---|
| ECS-600 | 600 mm | 1–3 t/h | 4 kW | Ø300 mm | Up to 4,000 RPM |
| ECS-800 | 800 mm | 2–5 t/h | 5.5 kW | Ø300 mm | Up to 4,000 RPM |
| ECS-1000 | 1,000 mm | 3–8 t/h | 7.5 kW | Ø350 mm | Up to 3,800 RPM |
| ECS-1200 | 1,200 mm | 5–12 t/h | 11 kW | Ø350 mm | Up to 3,800 RPM |
| ECS-1500 | 1,500 mm | 8–18 t/h | 15 kW | Ø400 mm | Up to 3,500 RPM |
| ECS-2000 | 2,000 mm | 12–25 t/h | 22 kW | Ø400 mm | Up to 3,500 RPM |
All models feature VFD (variable frequency drive) for rotor speed adjustment, NdFeB rare-earth magnets, replaceable non-magnetic shell, and adjustable splitter plate. Visit our eddy current separator product page for full specifications and configuration options.
Industry Applications
Eddy current separators serve every industry that needs to recover non-ferrous metals from mixed material streams:
Municipal Solid Waste (MSW) Recycling
In materials recovery facilities (MRFs), ECS recovers aluminum cans and other non-ferrous metals after magnetic separation removes steel. A typical MRF processes 20–50 t/h and recovers 95%+ of aluminum cans with a single ECS pass. The recovered aluminum generates $800–$1,500/ton revenue — often the highest-value stream in MSW recycling. See our complete MSW sorting machine lineup.
Auto Shredder Residue (ASR)
After end-of-life vehicles are shredded, the mixed output contains aluminum engine parts, copper wiring, brass fittings, and zinc die-castings among plastic and glass. Multi-stage ECS processing (coarse fraction + fine fraction) recovers 85–92% of non-ferrous metals from ASR, adding $50–$120 per vehicle in recovered metal value.
Incineration Bottom Ash (IBA)
Waste-to-energy plant bottom ash contains 5–12% non-ferrous metals by weight — primarily aluminum and copper. Processing IBA through screening, magnetic separation, and eccentric/high-frequency ECS recovers metals worth €40–€80 per ton of ash processed. This application requires fine-particle ECS capability (down to 5 mm) due to the granular nature of IBA.
Electronic Waste (WEEE)
After shredding, e-waste contains copper, aluminum, brass, and precious metals mixed with plastic and circuit board fragments. ECS recovers the bulk non-ferrous metals; downstream sensor-based sorting or density separation further purifies the output. Typical recovery: 80–90% of aluminum and copper from shredded WEEE.
PET Bottle Recycling
Aluminum closures and rings must be removed from PET flake streams to achieve food-grade purity. An ECS positioned after crushing and washing removes 98%+ of aluminum contamination, bringing metal content below the 50 ppm threshold required for bottle-to-bottle recycling. Learn more about achieving ≤50 ppm metal in recycled pellets.
Construction & Demolition (C&D) Waste
Demolition debris contains aluminum window frames, copper pipe and wire, brass fixtures, and other non-ferrous metals. After primary crushing and ferrous removal, ECS recovers these high-value metals from the mixed aggregate, wood, and concrete stream.
Where ECS Fits in a Recycling Line
An eddy current separator never operates alone. Here is the typical position in a recycling line and the equipment it works alongside:
Typical processing sequence:
- Size reduction — shredder or crusher breaks material to processable size
- Screening — trommel or vibrating screen separates material into size fractions
- Ferrous removal — magnetic separator (overband, drum, or pulley) removes steel and iron
- Eddy current separation — ECS recovers non-ferrous metals from remaining stream
- Further sorting — sensor-based sorting, density separation, or manual QC for final purity
For maximum recovery, many facilities use two ECS units in series: a concentric unit for the coarse fraction (>20 mm) and an eccentric or high-frequency unit for the fine fraction (5–20 mm). This dual-stage approach recovers 15–25% more non-ferrous metal than a single-pass system.
5-Step Selection Framework
Use this framework when specifying an eddy current separator for your operation:
Step 1: Characterize Your Feed Material
Identify the non-ferrous metals present (aluminum, copper, brass, zinc), their particle size distribution, percentage by weight in the feed, and moisture level. This determines whether you need a concentric, eccentric, or high-frequency ECS design and what recovery rate to expect.
Step 2: Determine Required Throughput
Measure your feed rate in tons per hour. The ECS belt width must handle this volume while maintaining monolayer feed distribution. A 1,000 mm belt handles 3–8 t/h depending on material bulk density; wider belts for higher throughput. Always size for peak capacity plus 20% margin.
Step 3: Choose Rotor Configuration
Concentric rotor for particles >20 mm (standard applications). Eccentric rotor for particles 5–50 mm (fine fraction, IBA, WEEE). High-frequency rotor for particles 5–20 mm (maximum fine-particle recovery). If your feed contains both coarse and fine fractions, plan for two ECS units in series.
Step 4: Verify Upstream Equipment
Confirm ferrous pre-removal is adequate (≤0.5% ferrous in ECS feed). Verify screening/sizing produces the correct size fraction for your ECS type. Ensure vibratory feeder or spreading conveyor is included for uniform monolayer distribution. Missing any upstream step significantly reduces ECS performance.
Step 5: Calculate ROI
Estimate annual non-ferrous recovery tonnage × metal value per ton = gross revenue. Subtract ECS operating costs (electricity, belt replacement every 12–18 months, rotor shell replacement every 3–5 years, maintenance labor). Most ECS installations achieve payback within 6–18 months based on recovered metal value alone — aluminum recovery at 95% rates generates $800–$1,500/ton revenue.
Maintenance and Troubleshooting
Eddy current separators are relatively low-maintenance compared to other recycling equipment, but regular checks prevent costly downtime:
| Interval | Task | Details |
|---|---|---|
| Daily | Visual inspection | Check belt tracking, splitter position, and discharge areas for material buildup |
| Weekly | Belt tension check | Verify belt tension and alignment; misalignment causes uneven wear and reduced separation |
| Monthly | Bearing lubrication | Grease rotor and drive bearings per manufacturer schedule |
| Monthly | Shell inspection | Check non-magnetic shell for wear marks from ferrous contamination; replace if worn through |
| Quarterly | Magnetic field check | Verify rotor magnetic field strength with a gaussmeter — NdFeB magnets degrade <1% per year |
| Annually | Belt replacement | Replace conveyor belt; inspect drive components, rollers, and bearings |
| 3–5 years | Shell replacement | Replace non-magnetic rotor shell (carbon fiber or stainless steel) when worn below minimum thickness |
Common issues and solutions:
- Low recovery rate → Check feed layer uniformity (most common cause), verify rotor speed matches particle size, inspect splitter position
- Metal in non-metal bin → Increase rotor speed, reduce belt speed, or move splitter further from belt
- Non-metal in metal bin → Decrease rotor speed, increase belt speed, or move splitter closer to belt
- Belt damage → Ferrous contamination reaching rotor; improve upstream magnetic separation
- Excessive vibration → Check rotor balance, bearing condition, and belt tracking alignment
Getting Started with Energycle
Energycle manufactures eddy current separators in concentric and eccentric configurations with belt widths from 600 mm to 2,000 mm. We also provide complete sorting and recycling line integration including:
- Free material testing — send us a sample of your waste stream and we test separation performance on our ECS units
- Custom rotor configurations — pole count, magnet grade, and rotor speed optimized for your specific material
- Complete line design — from shredding through screening, magnetic separation, eddy current separation, and sensor sorting
- After-sales support — spare belts, replacement shells, remote troubleshooting, and on-site commissioning
Contact our engineering team with your material type, throughput, and target metal recovery — we will recommend the right ECS configuration and provide a detailed quotation within 48 hours.
Frequently Asked Questions
How does an eddy current separator work?
An eddy current separator works by spinning a magnetic rotor at 2,000–5,000 RPM inside a non-magnetic shell drum. When non-ferrous metals pass over the rotor on a conveyor belt, the rapidly changing magnetic field induces eddy currents inside the metals. These eddy currents create opposing magnetic fields (per Lenz’s Law), generating a repulsive force that launches metals off the belt into a separate collection bin, while non-conductive materials simply fall off the end.
What metals can an eddy current separator recover?
Eddy current separators recover non-ferrous metals including aluminum (cans, extrusions, castings), copper (wire, pipe, fittings), brass, zinc die-castings, magnesium, and other conductive non-magnetic metals. Aluminum has the highest recovery rate (95%+) due to its high conductivity-to-density ratio. Copper and brass recovery is also good (85–92%) with proper rotor speed and belt speed optimization.
What is the difference between concentric and eccentric eddy current separators?
A concentric ECS has the rotor centered inside the shell, creating a uniform field ideal for particles 20–150 mm — the standard choice for most recycling applications. An eccentric ECS offsets the rotor to concentrate maximum field intensity at the separation point, enabling effective recovery of fine particles down to 5 mm. Choose concentric for general recycling; eccentric for IBA, WEEE, and fine-fraction applications.
What particle size can an eddy current separator process?
Standard concentric ECS units effectively separate particles from 20 mm to 150 mm. Eccentric and high-frequency models extend the lower range to 5 mm. Particles below 5 mm generally cannot be separated by ECS and require alternative technologies like electrostatic separation or wet gravity concentration. For best results, screen your material into size fractions and use the appropriate ECS type for each fraction.
How much does an eddy current separator cost?
Small ECS units (600 mm belt width, 1–3 t/h) start around $15,000–$25,000. Mid-range models (1,000–1,200 mm, 5–12 t/h) cost $30,000–$65,000. Large industrial units (1,500–2,000 mm, 12–25 t/h) range from $70,000–$150,000. Most installations achieve payback within 6–18 months from recovered metal value — a facility recovering 100 kg/h of aluminum generates $80,000–$150,000 annual revenue at current market prices.
Why is ferrous removal needed before an eddy current separator?
Ferrous metals (steel, iron) are attracted to the ECS magnetic rotor rather than repelled. They wrap around the shell, damaging the belt, blocking non-ferrous metal separation, and requiring costly emergency shutdowns for removal. Always install magnetic drums, overband magnets, or pulley magnets upstream to remove 99%+ of ferrous metals before the ECS.
Can an eddy current separator recover copper?
Yes, but copper is harder to separate than aluminum due to its higher density (8,960 kg/m³ vs. 2,700 kg/m³ for aluminum). Despite copper’s excellent conductivity, its lower conductivity-to-density ratio means the repulsive force relative to gravity is weaker. Optimize copper recovery by using slower belt speeds, higher rotor RPM, and an eccentric rotor design. Expect 85–92% copper recovery with proper optimization.
What maintenance does an eddy current separator require?
Daily: visual inspection of belt tracking and discharge. Weekly: belt tension check. Monthly: bearing lubrication and shell wear inspection. Annually: belt replacement. Every 3–5 years: rotor shell replacement. NdFeB magnets degrade less than 1% per year and typically last 15–20+ years. Total annual maintenance cost is typically 3–5% of equipment purchase price — far lower than most recycling machines.
Related Resources
- Eddy Current Magnetic Separator — Product Page
- Advanced Eddy Current Separator for Recycling
- High-Recovery ECS for Fine Aluminum
- Suspended Self-Discharging Magnetic Separator
- Sorting Machinery for Plastic Recycling
- MSW Sorting Machines
- Bag Breaker for MSW Sorting
- E-Scrap Shredder for WEEE
- How to Achieve ≤50 ppm Metal in Recycled Pellets
- Plastic Recycling Machine: Complete Guide